In this entry
- Creating a Discord bot
- Adding it to a test server
- Setting up Python
- Making the bot respond to messages
Creating a bot
Before adding features, we need a bot to put them in. Follow these steps to create one.
1. Create an application
Open the Discord Developer Portal and sign in. If you do not have an account, create one first.

The portal lets you create an application. An application provides the identity, authentication settings, and permissions needed to interact with the Discord API.
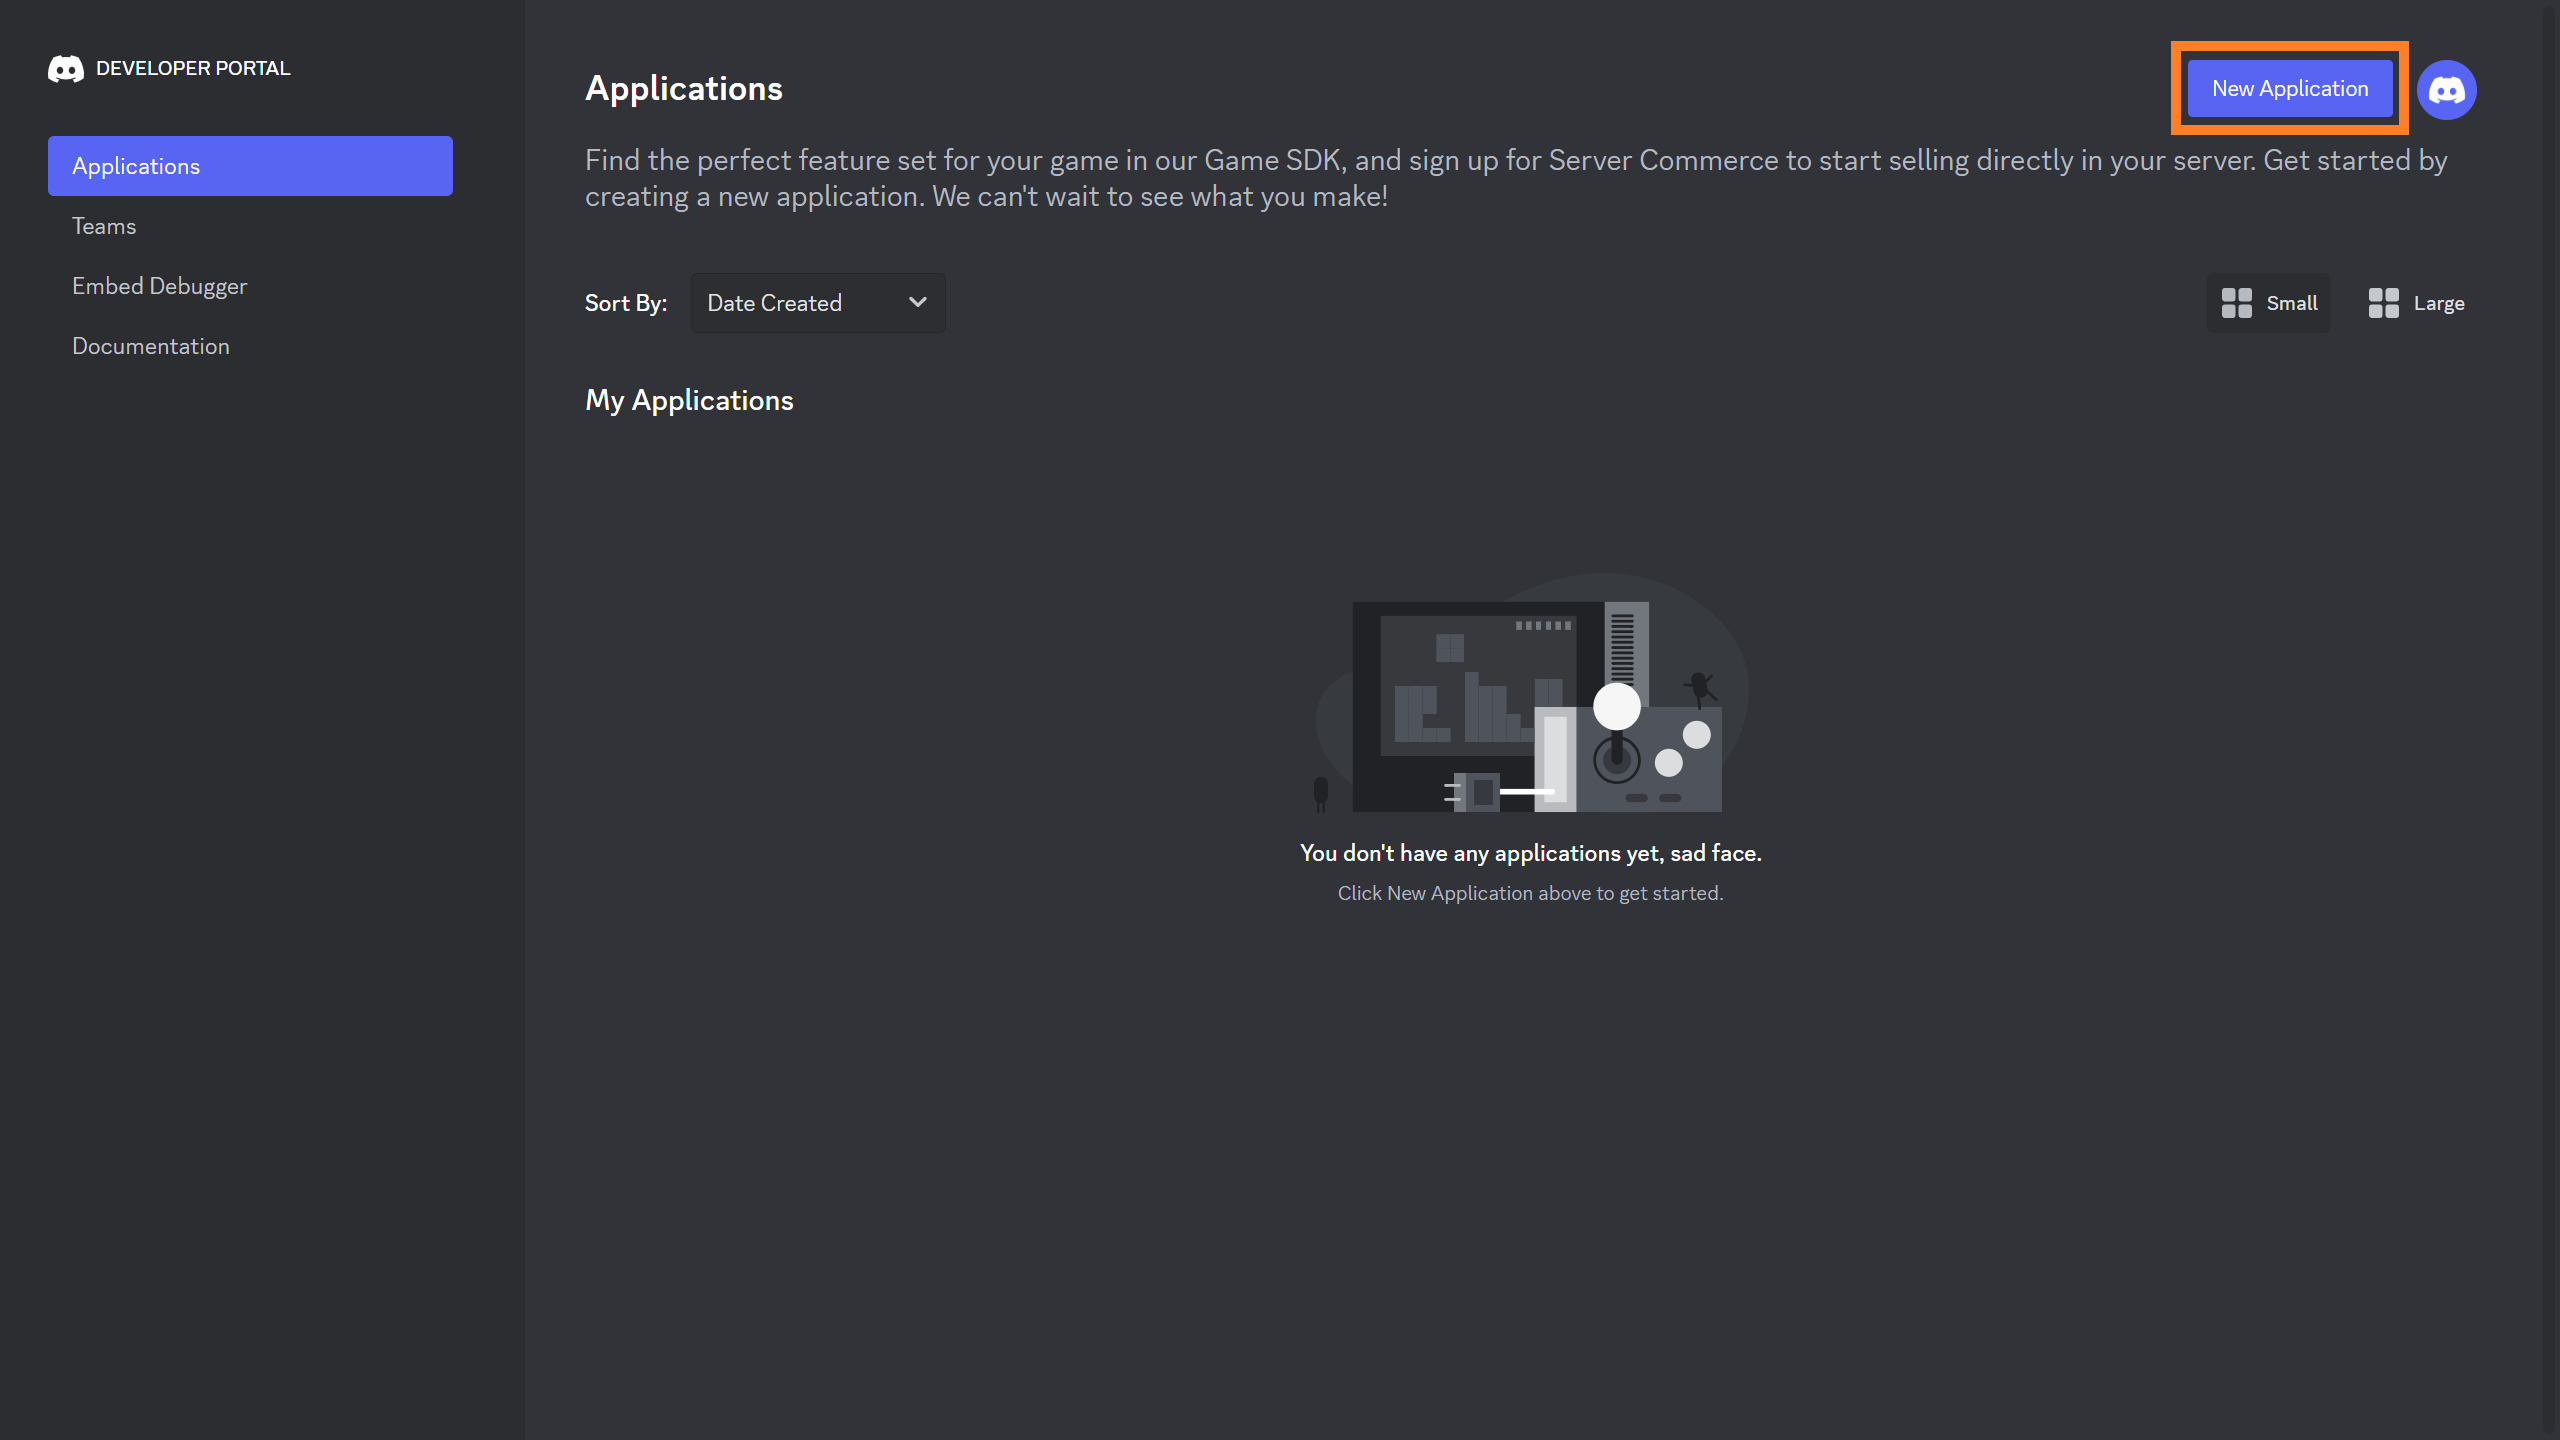
Choose New Application in the upper-right corner.
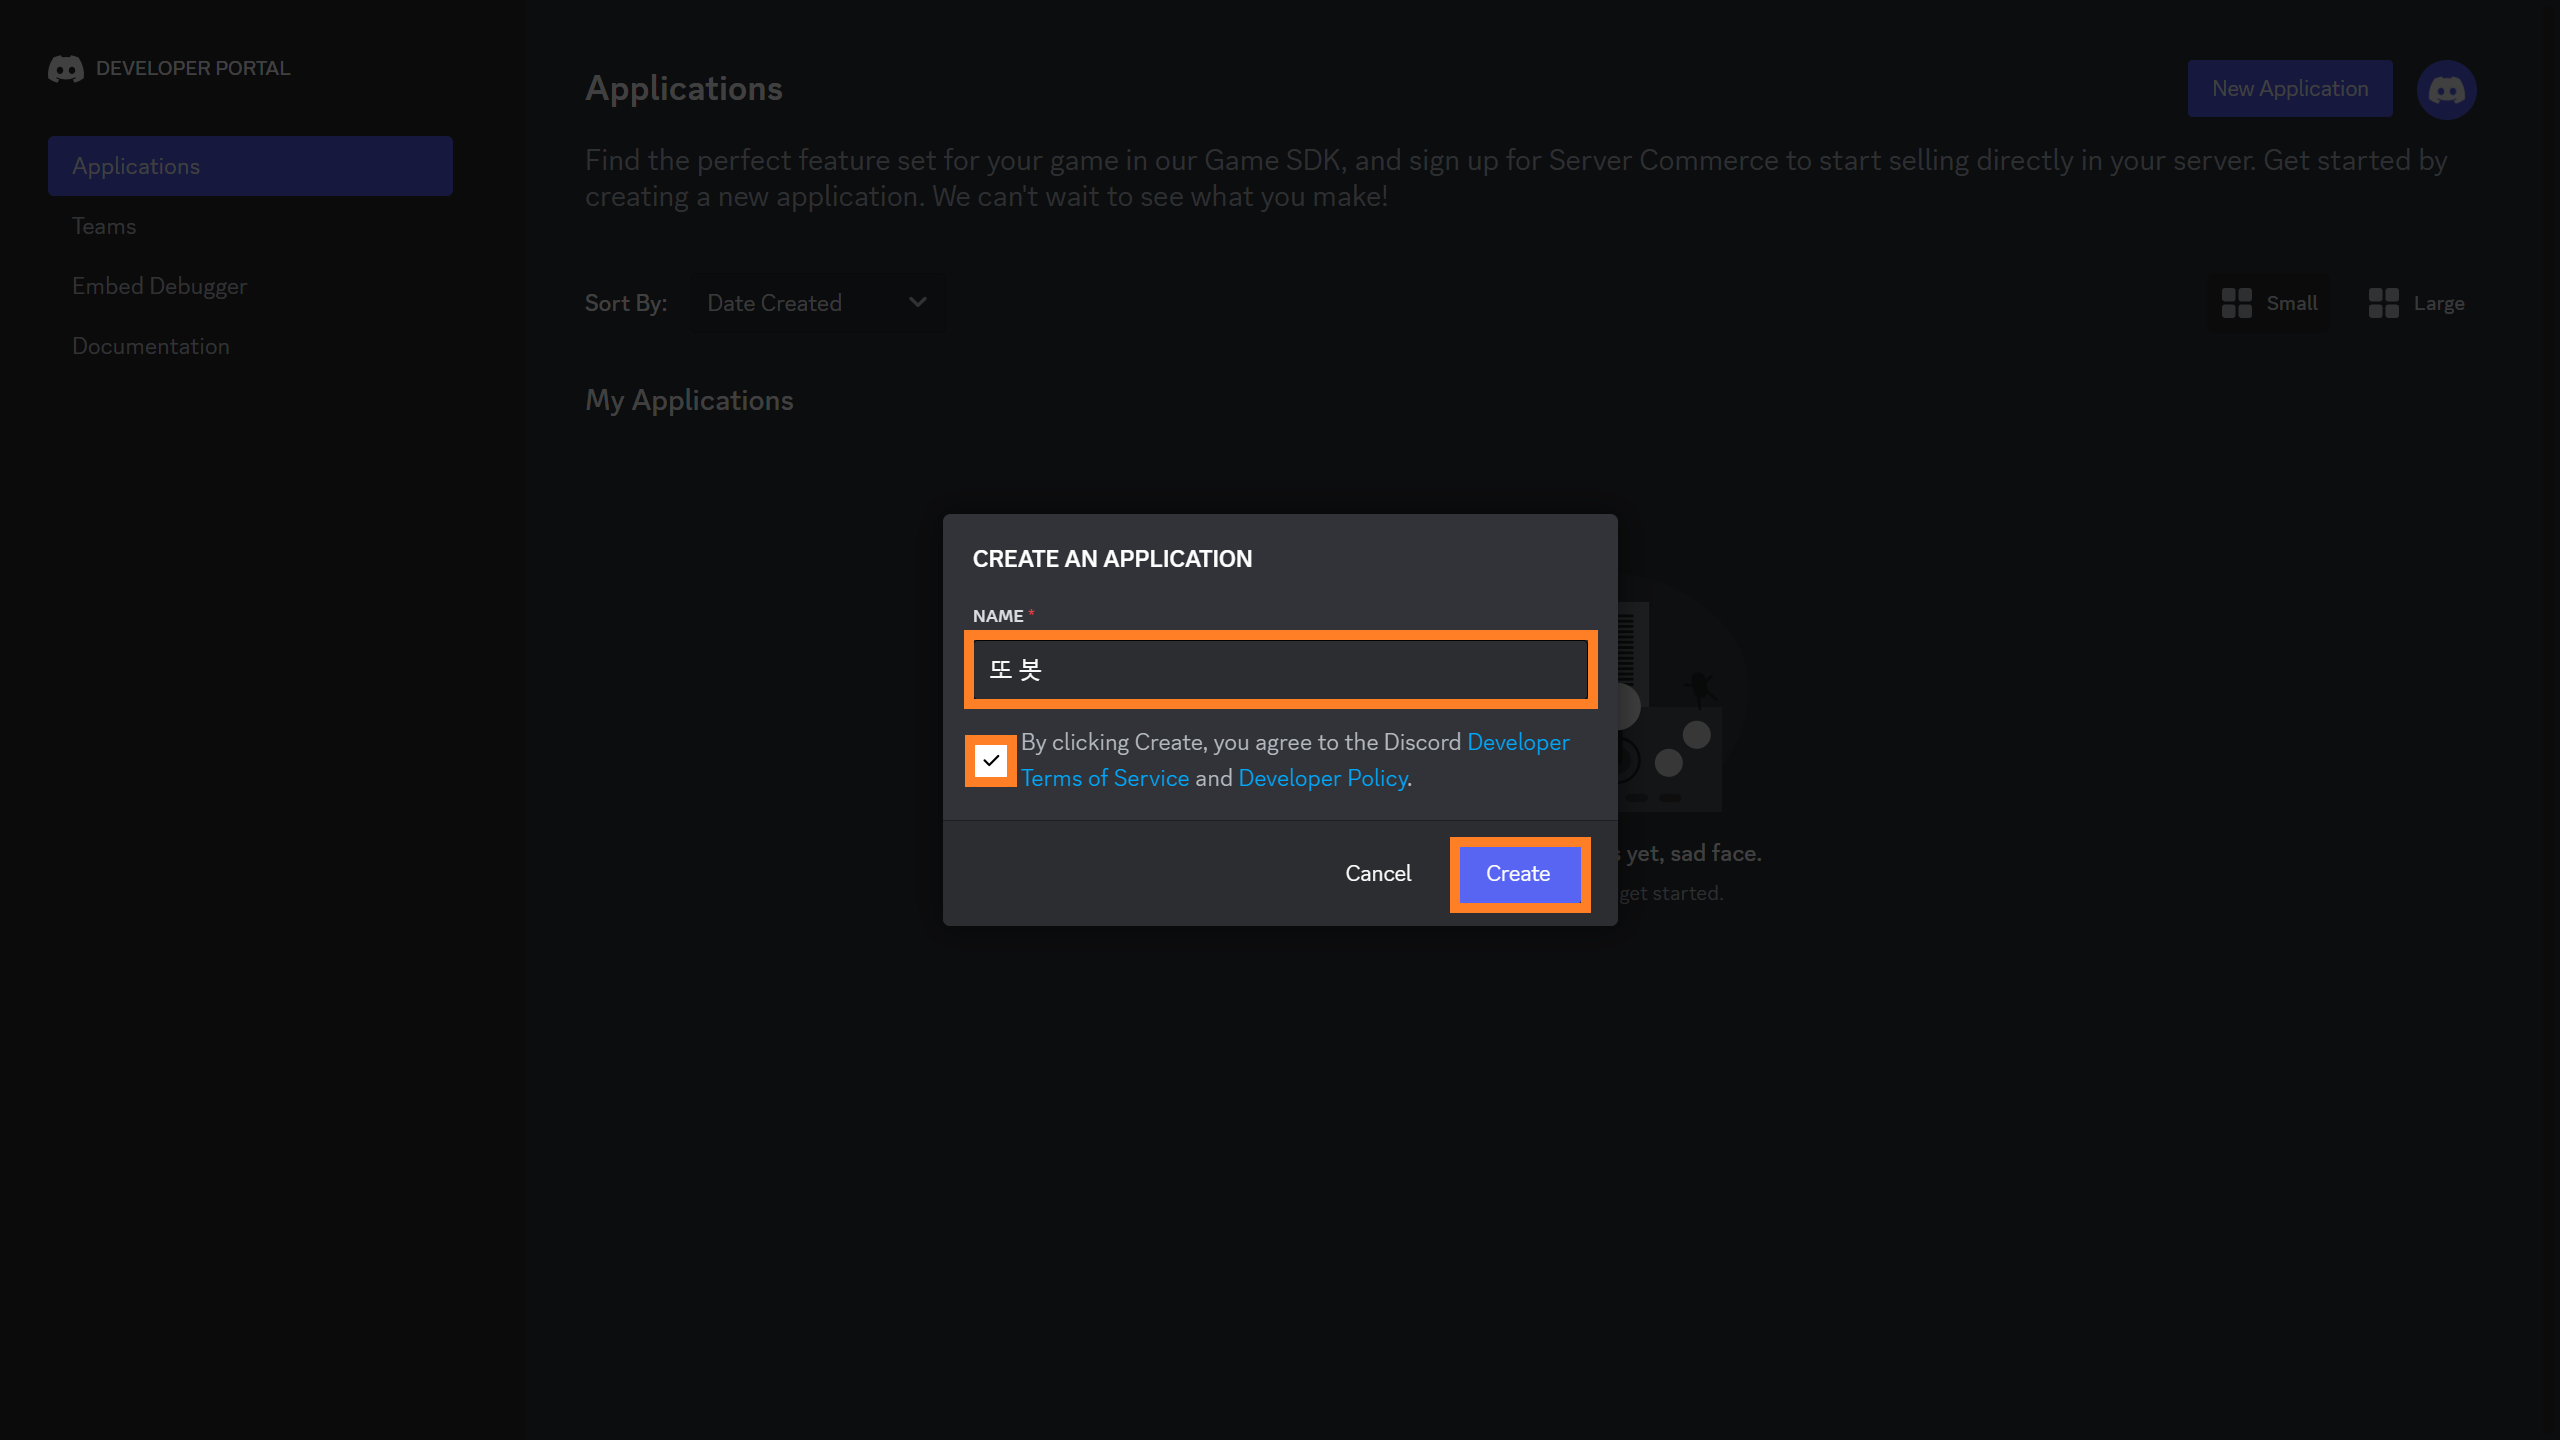
Enter a name and choose Create.
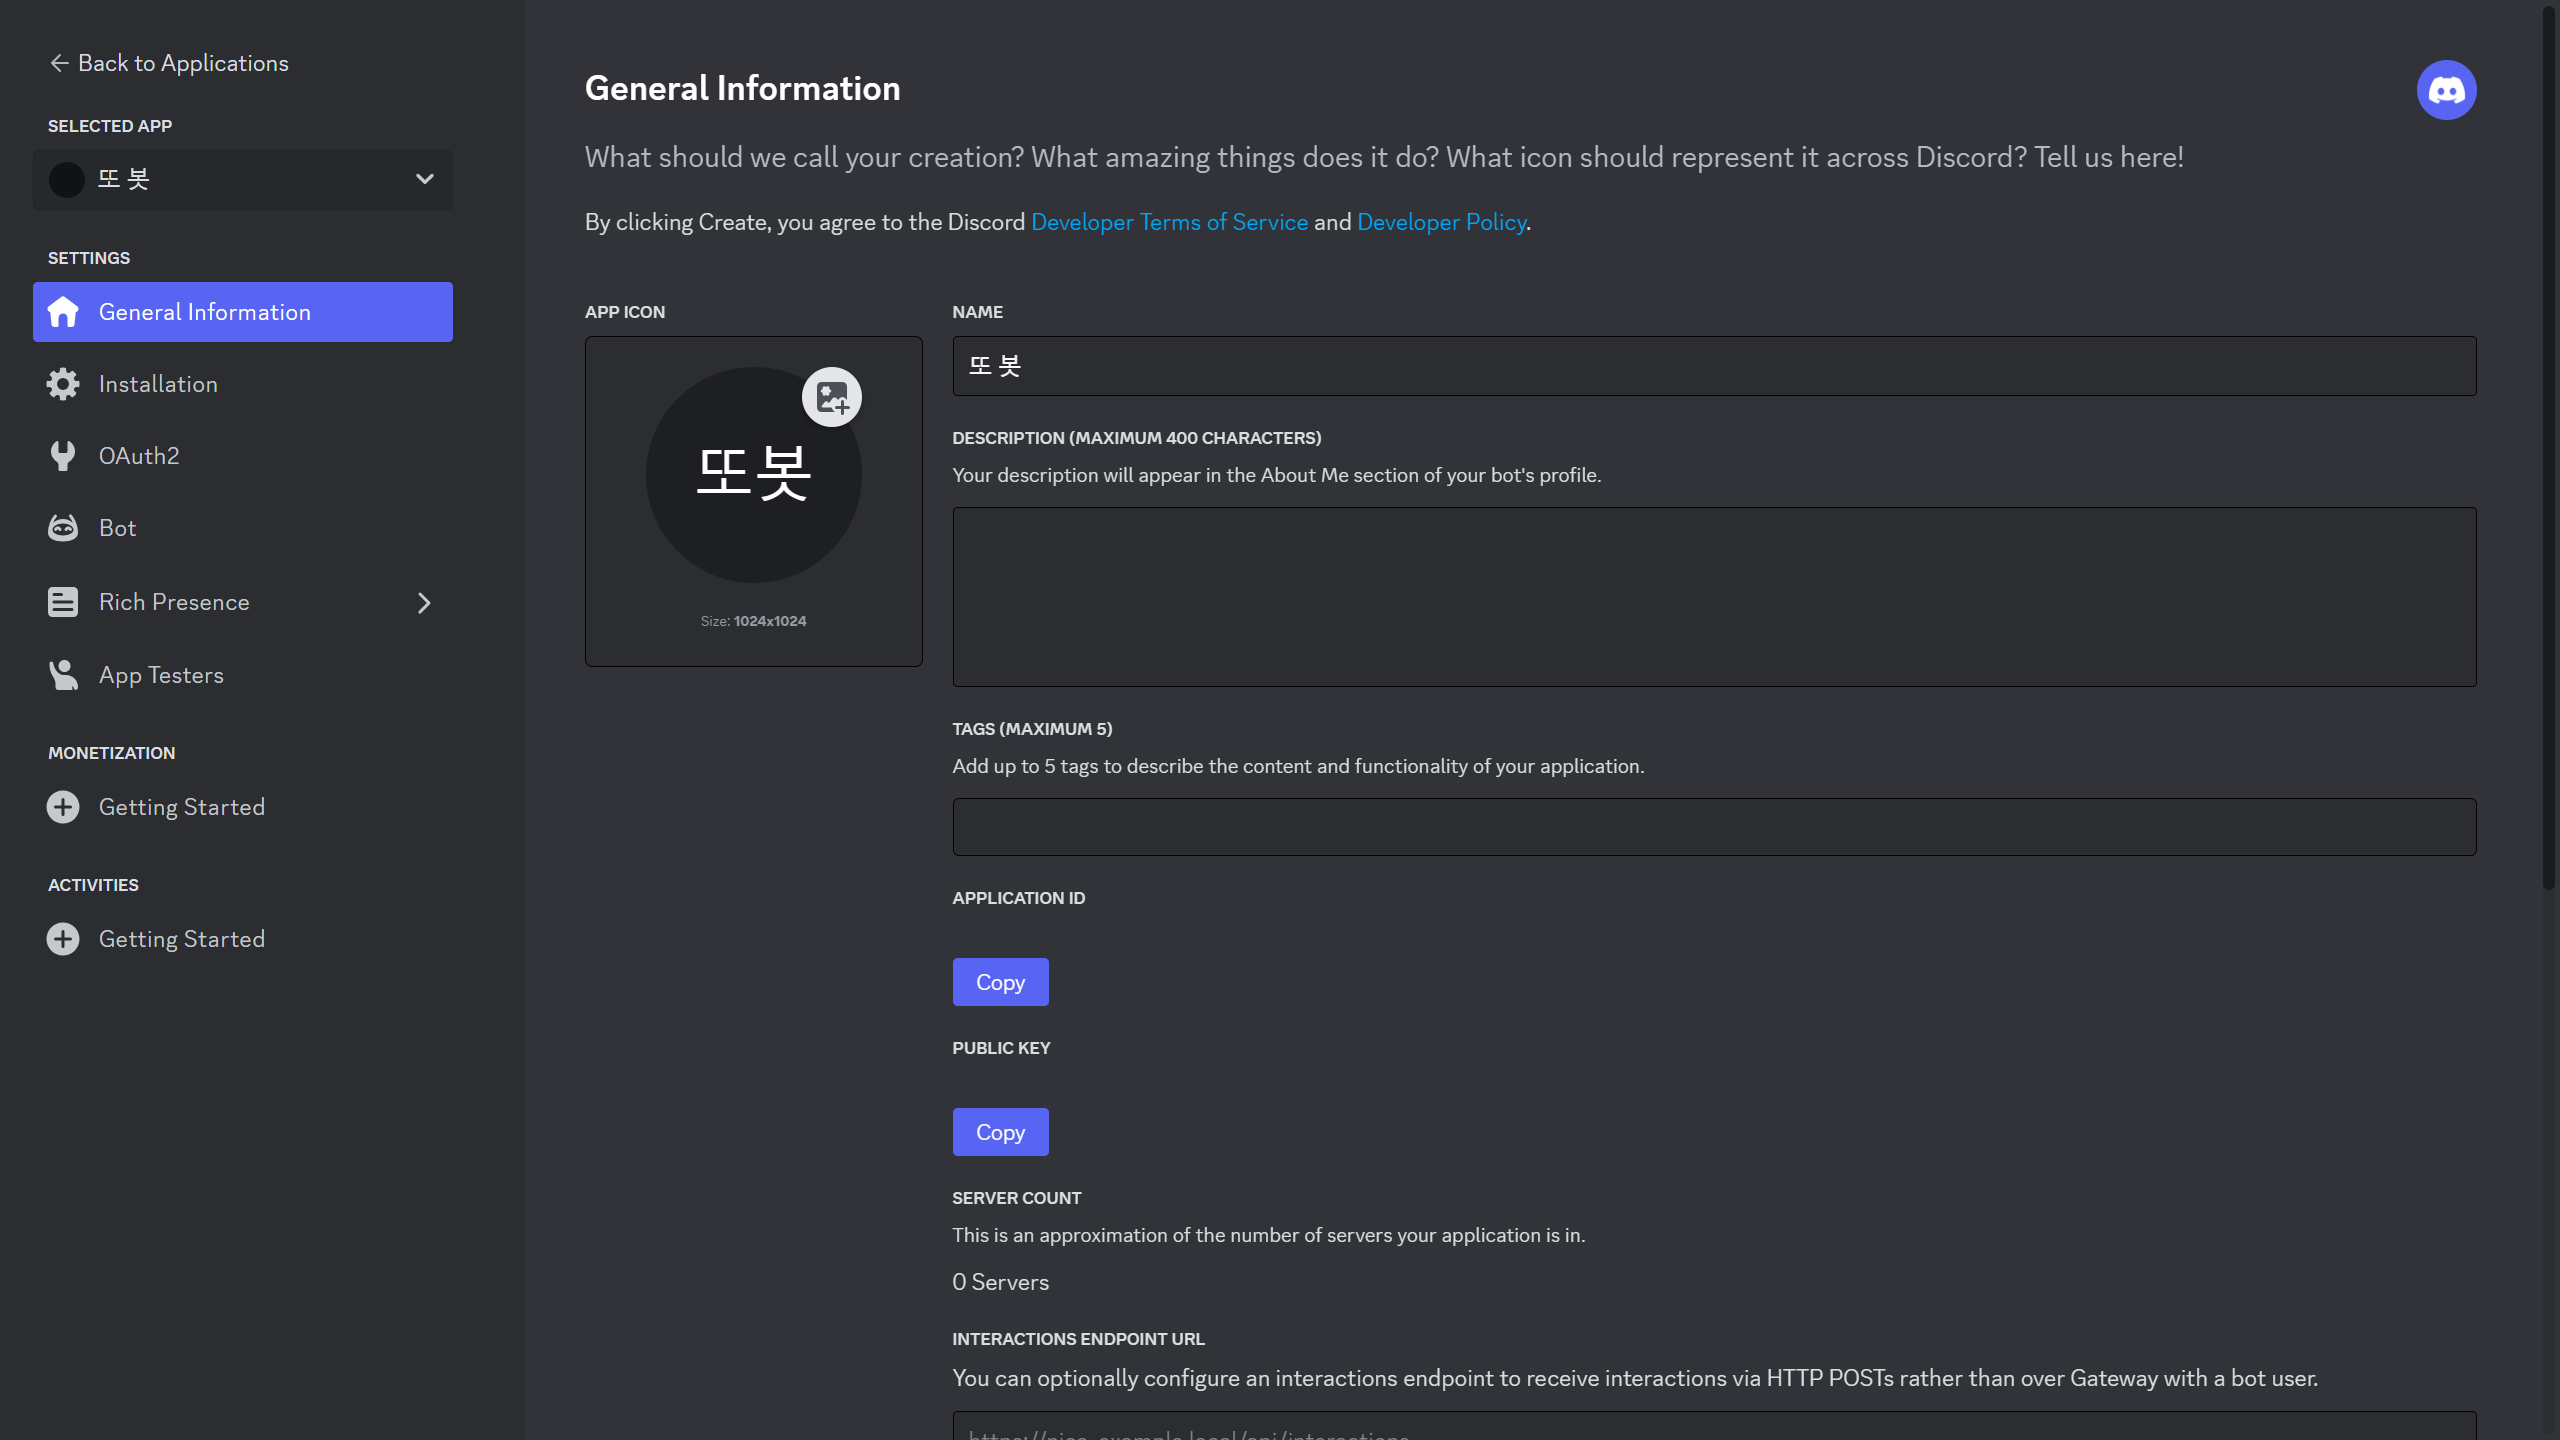
The application information page lets you change its icon, name, and description. Some application information can appear in installation and authorization screens.
Programs that interact with Discord’s API use a Discord application, including programs other than bots.
Open Bot in the left menu.
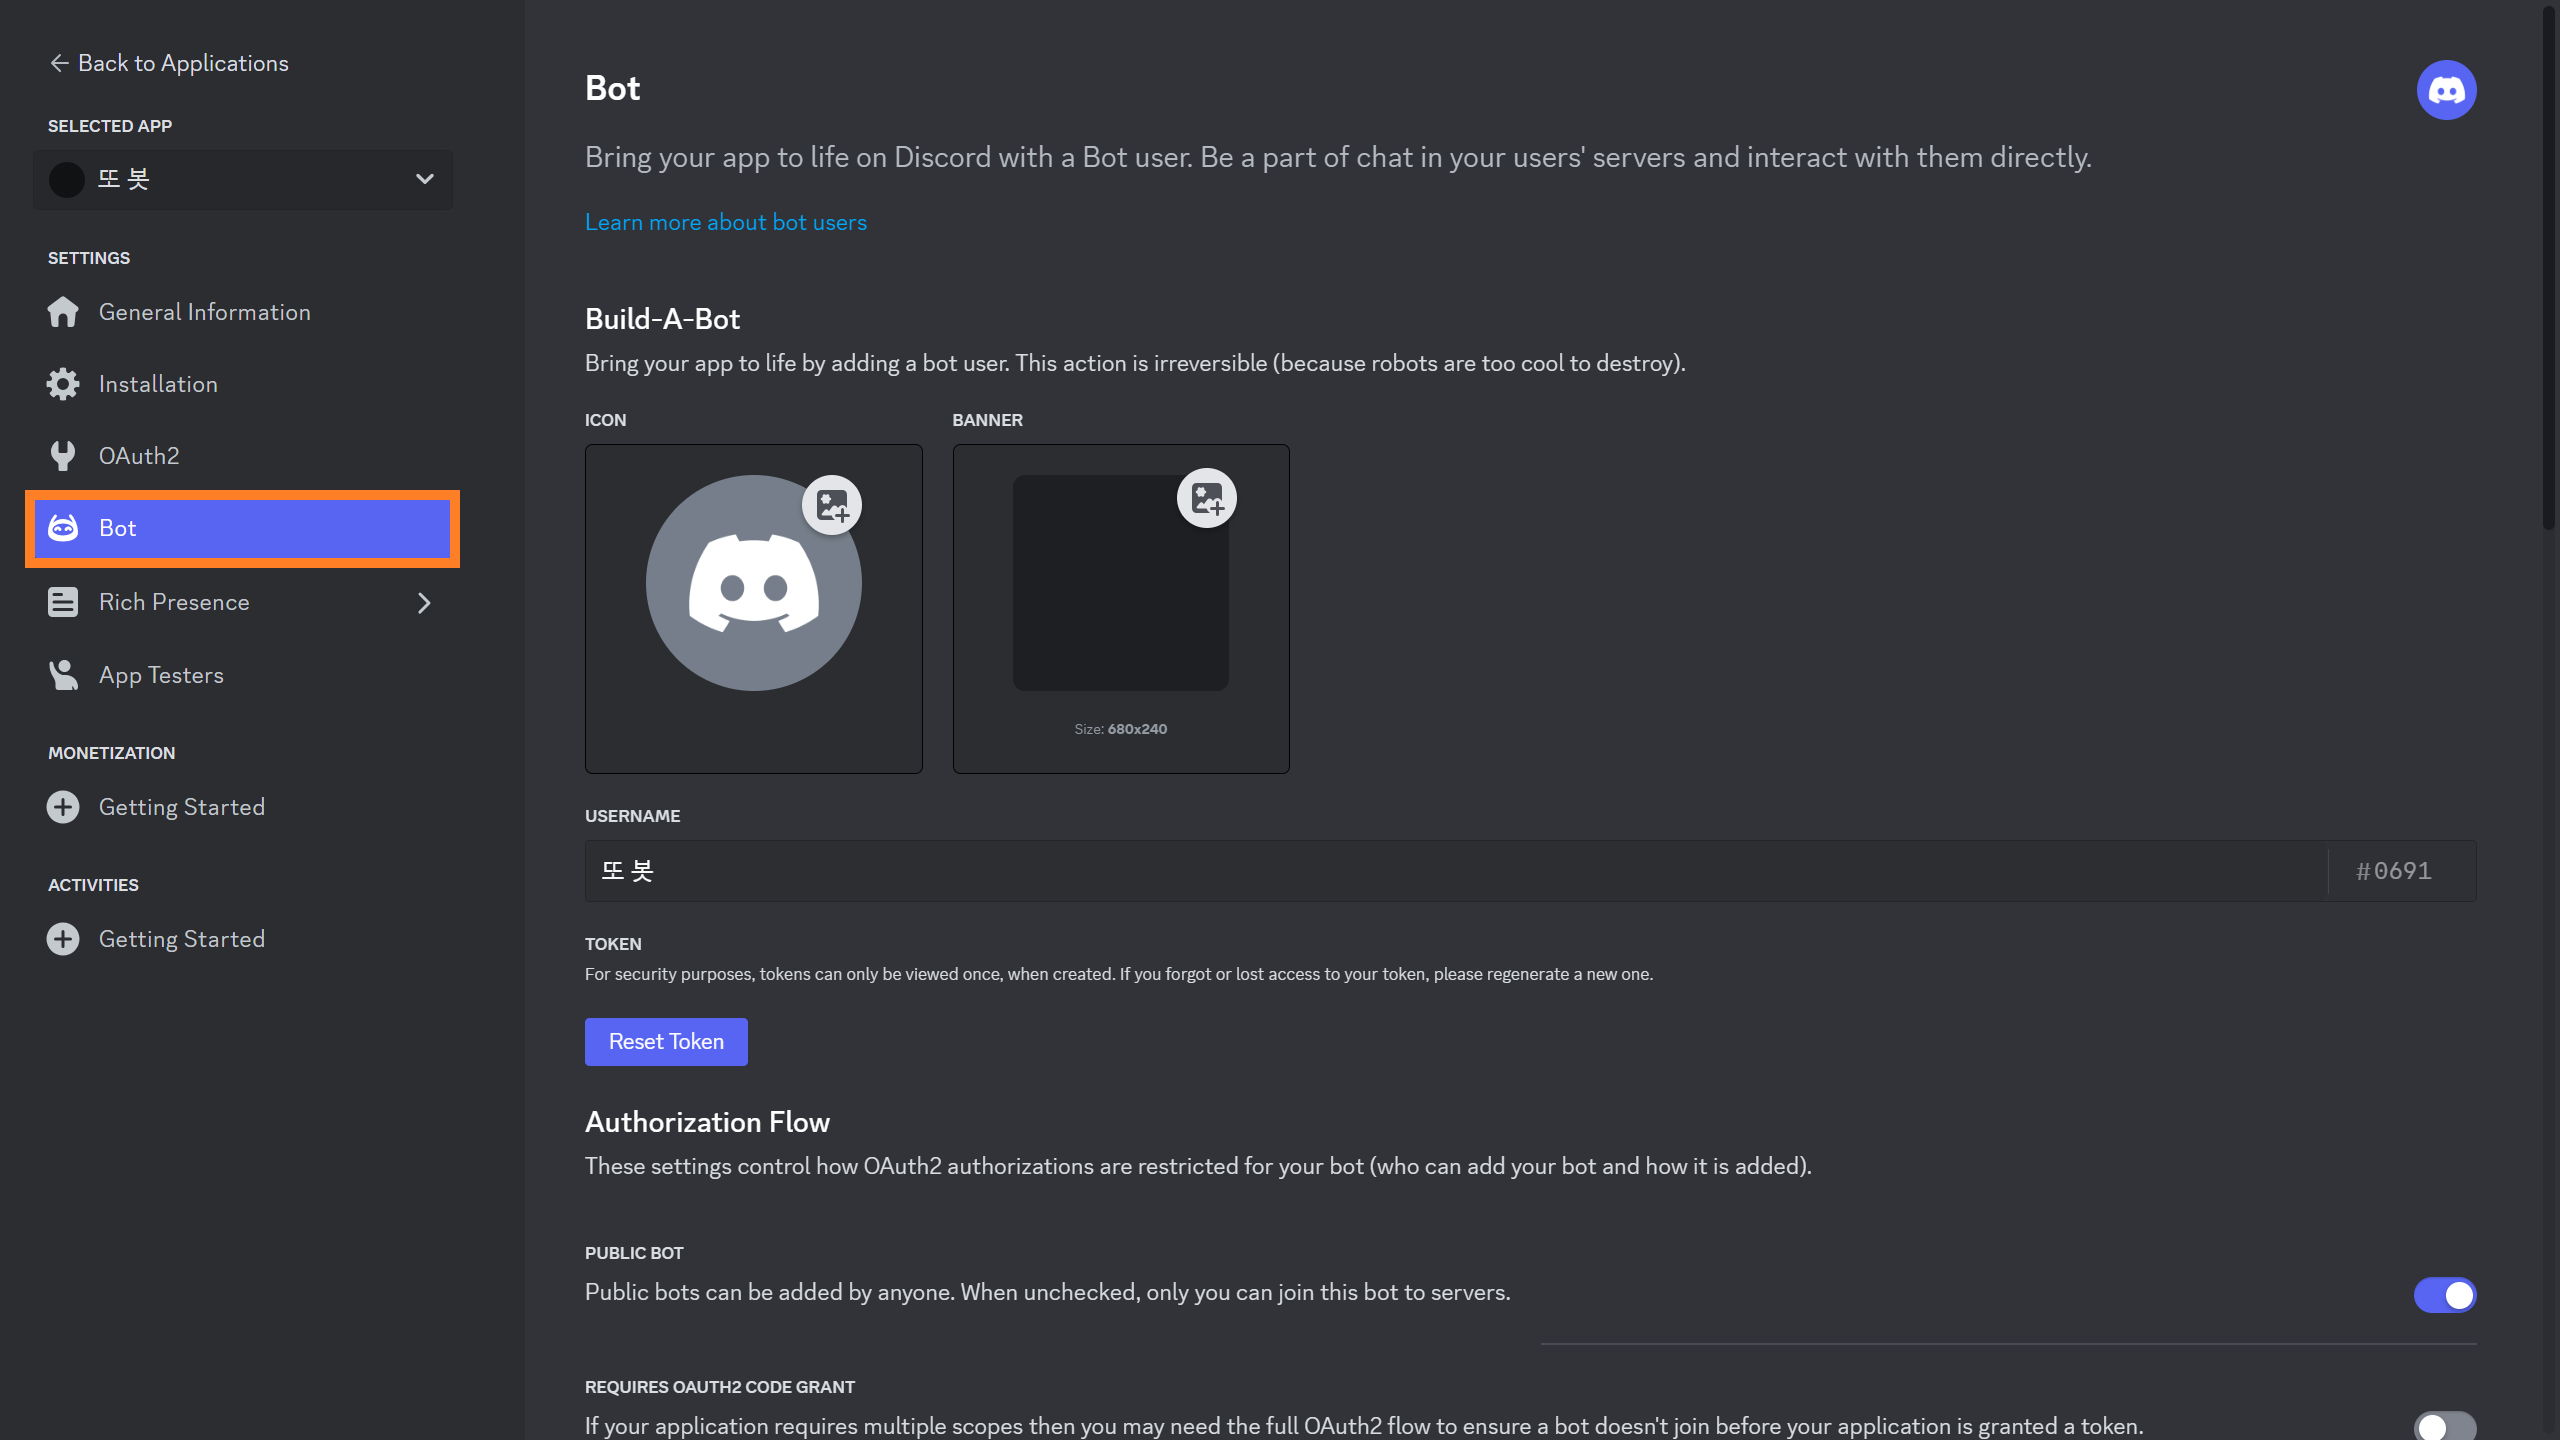
In the portal shown in May 2024, the application already had a bot. If yours does not, use Add Bot when that option is available. Portal screens can change over time.
The bot initially takes its name from the application. USERNAME, ICON, and BANNER control its visible identity. The numeric tag shown in these screenshots was not directly editable.
Keep the Developer Portal open; we will return to it shortly.
Now the bot needs a place to run alongside users.
2. Create a test guild
The API calls what Discord users usually call a server a guild. This distinguishes a community from the infrastructure that runs Discord itself. In our code, guild will refer to one of these communities.
This series uses guild when discussing a Discord community through the API.
You can invite the bot to an existing guild if you have the required permissions. A dedicated test guild is more convenient, though: testing a bot can generate a lot of messages.
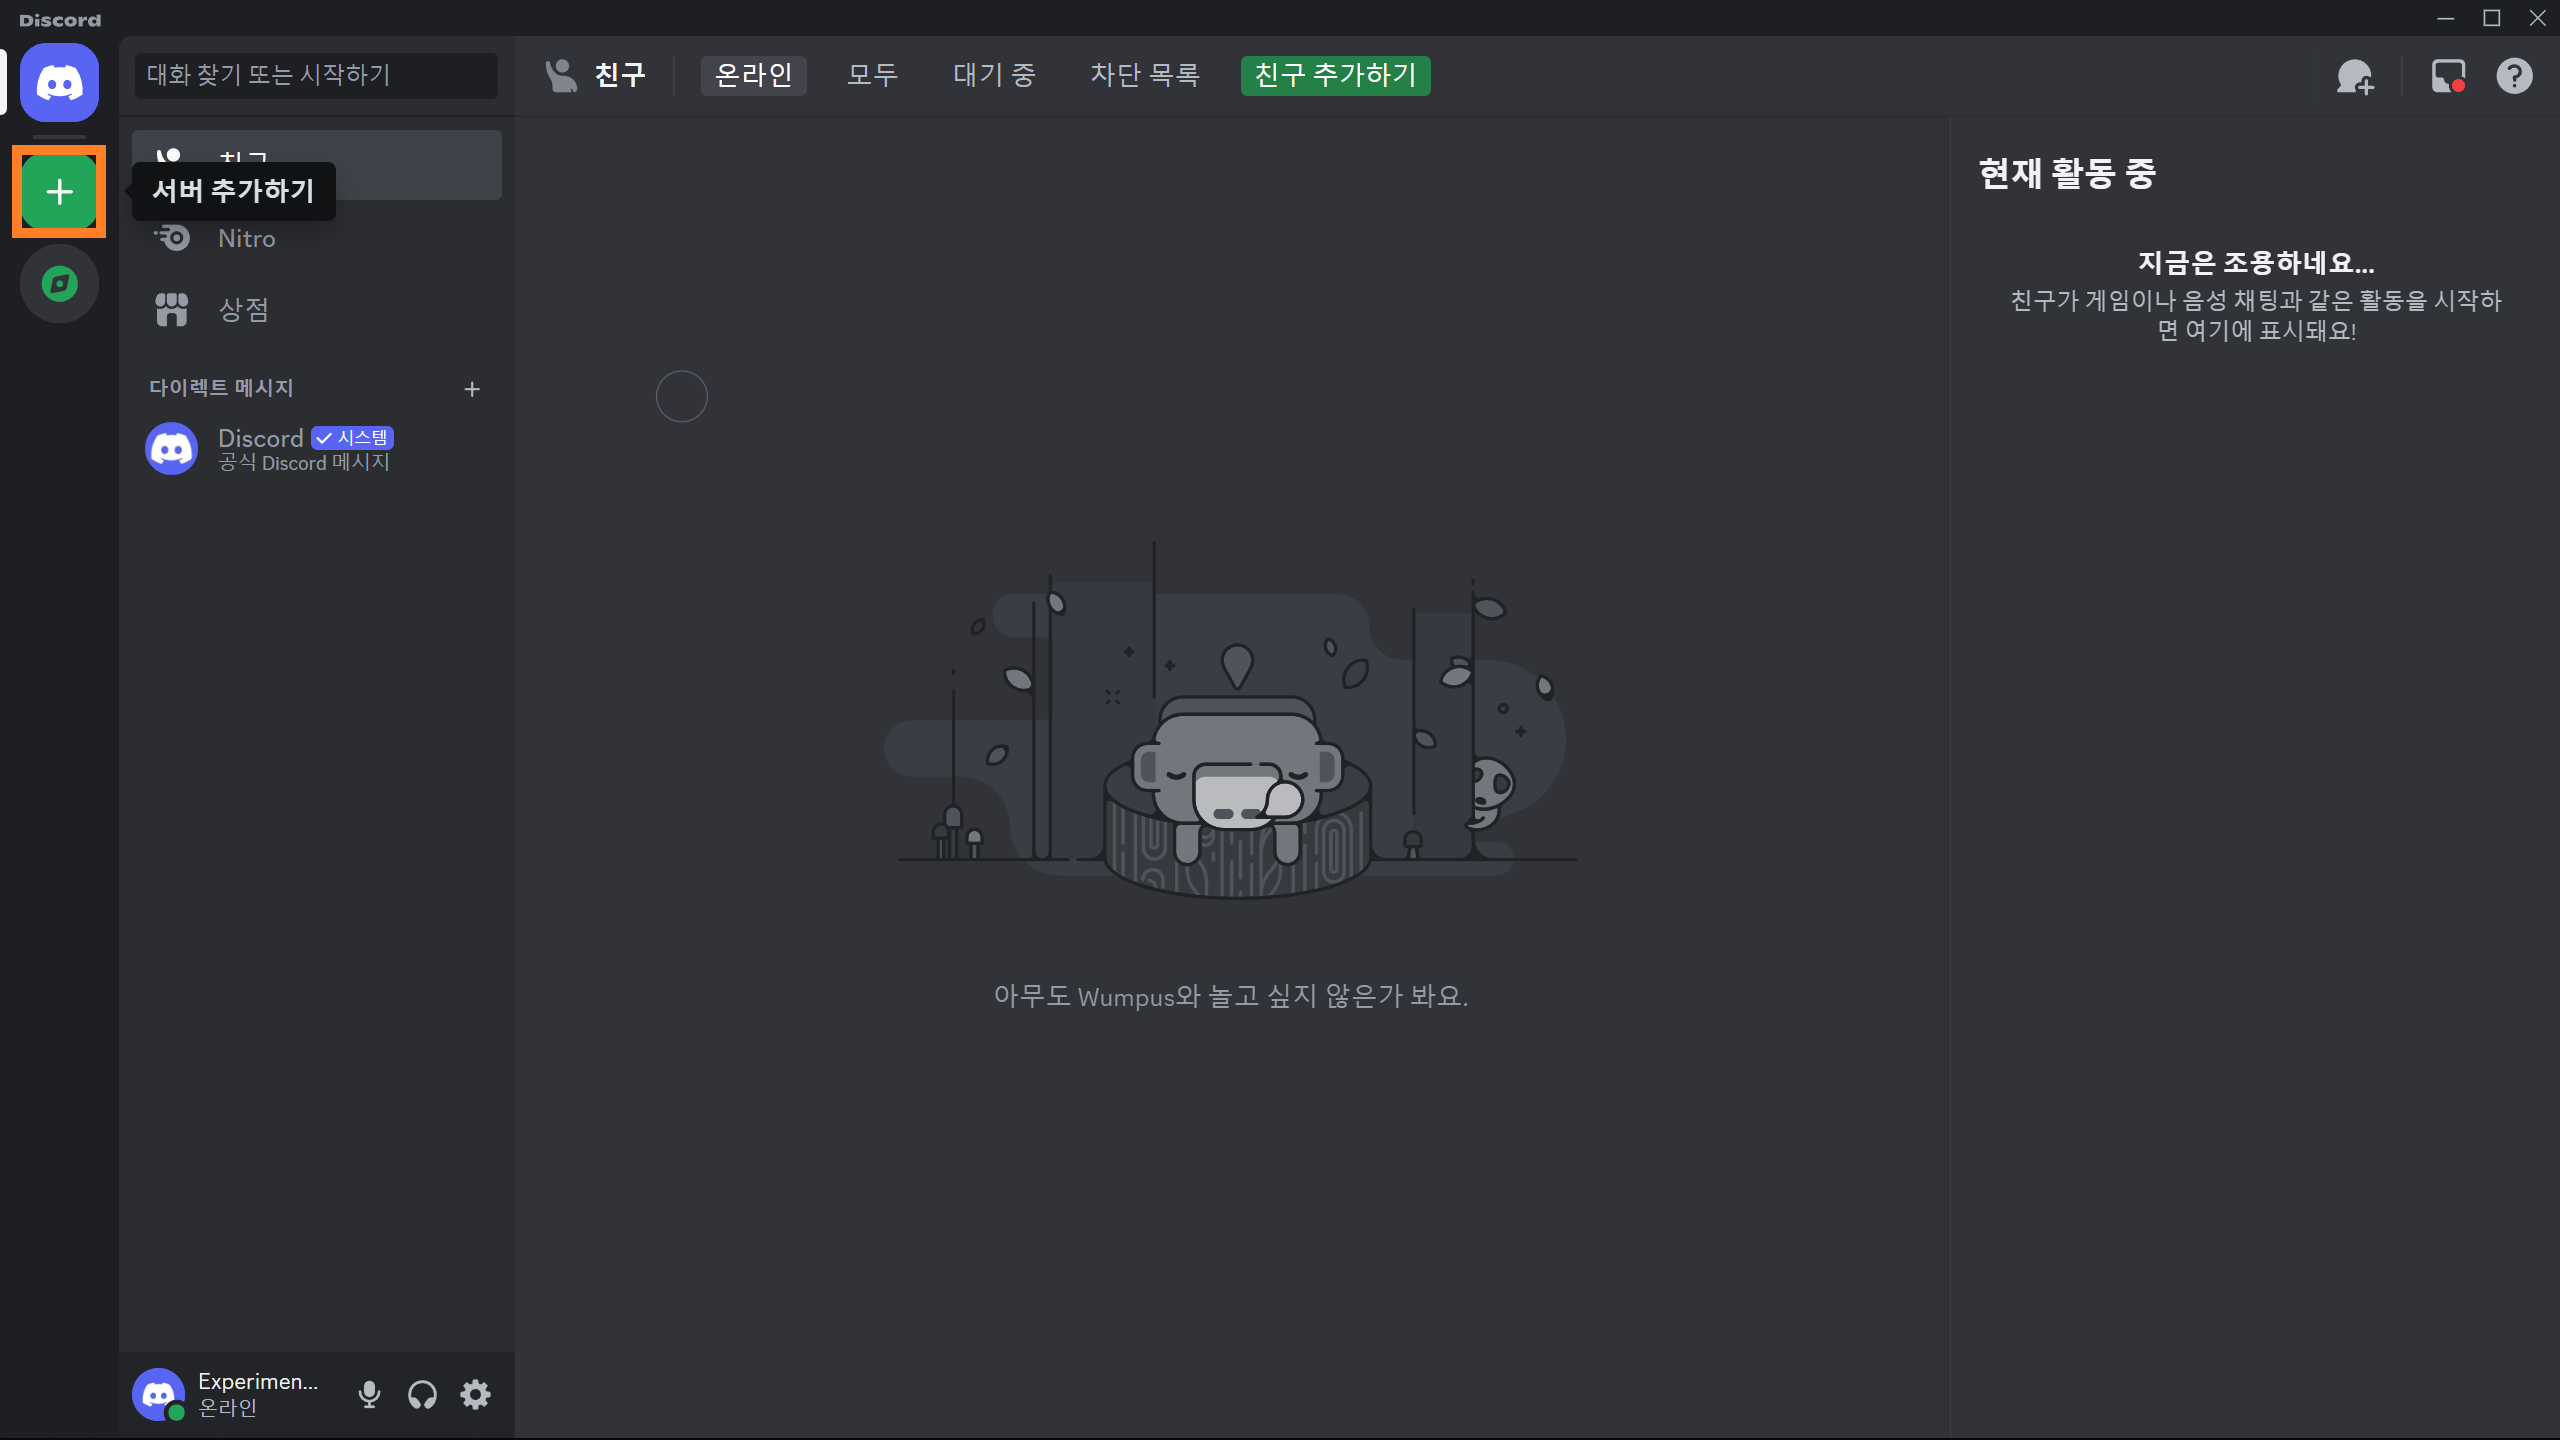
In the Discord app or website, choose the + at the bottom of the guild list.
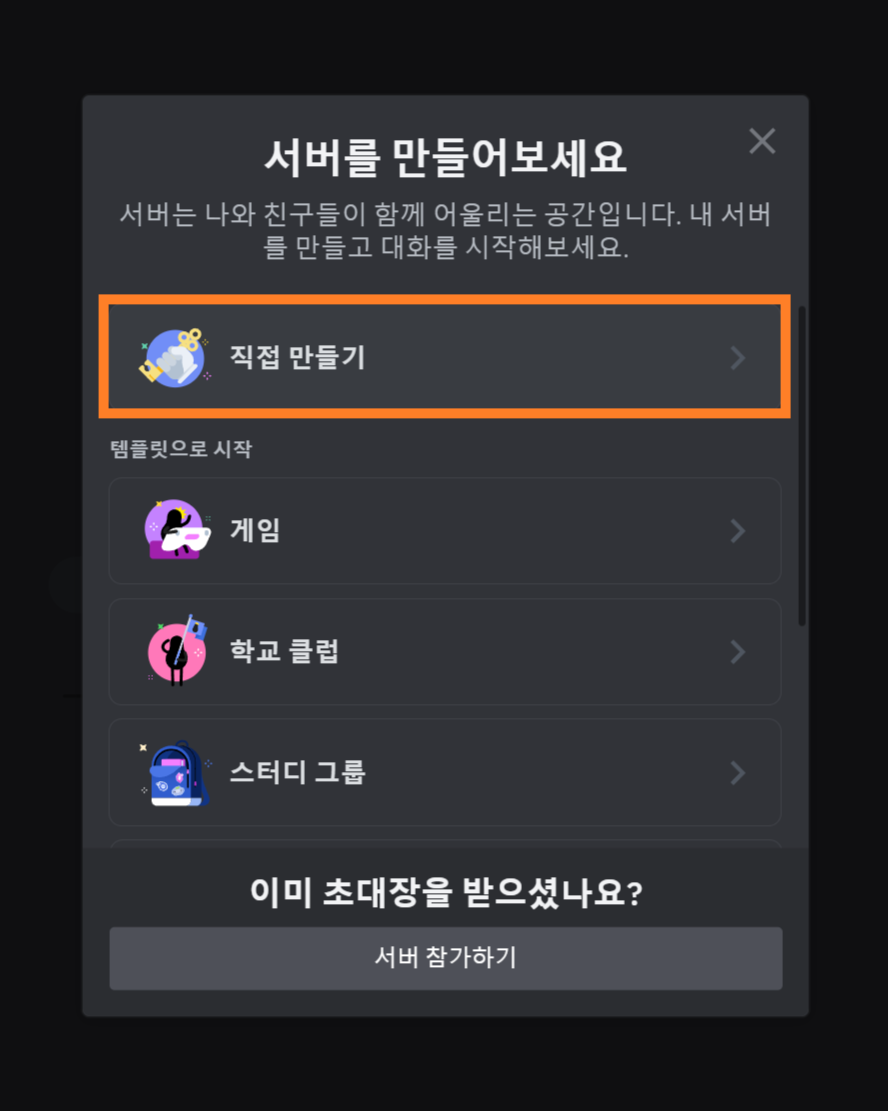
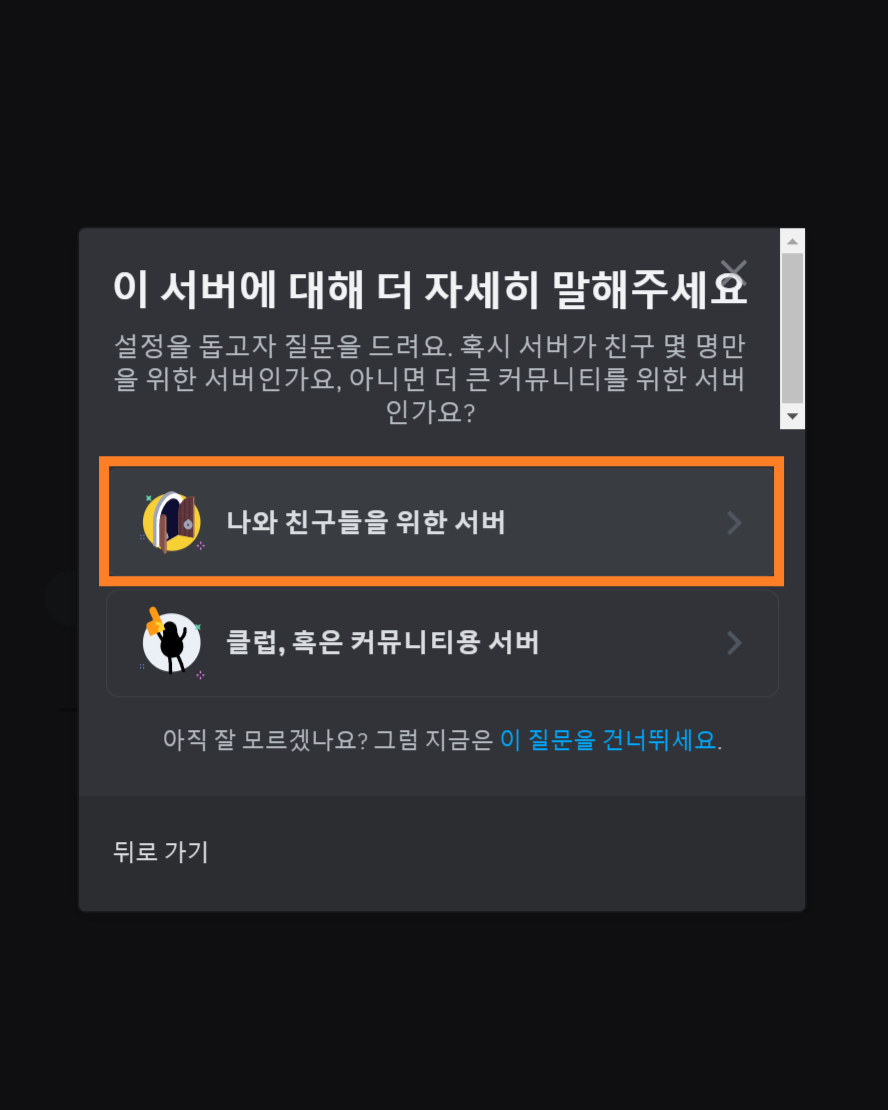
Choose Create My Own, then For me and my friends.
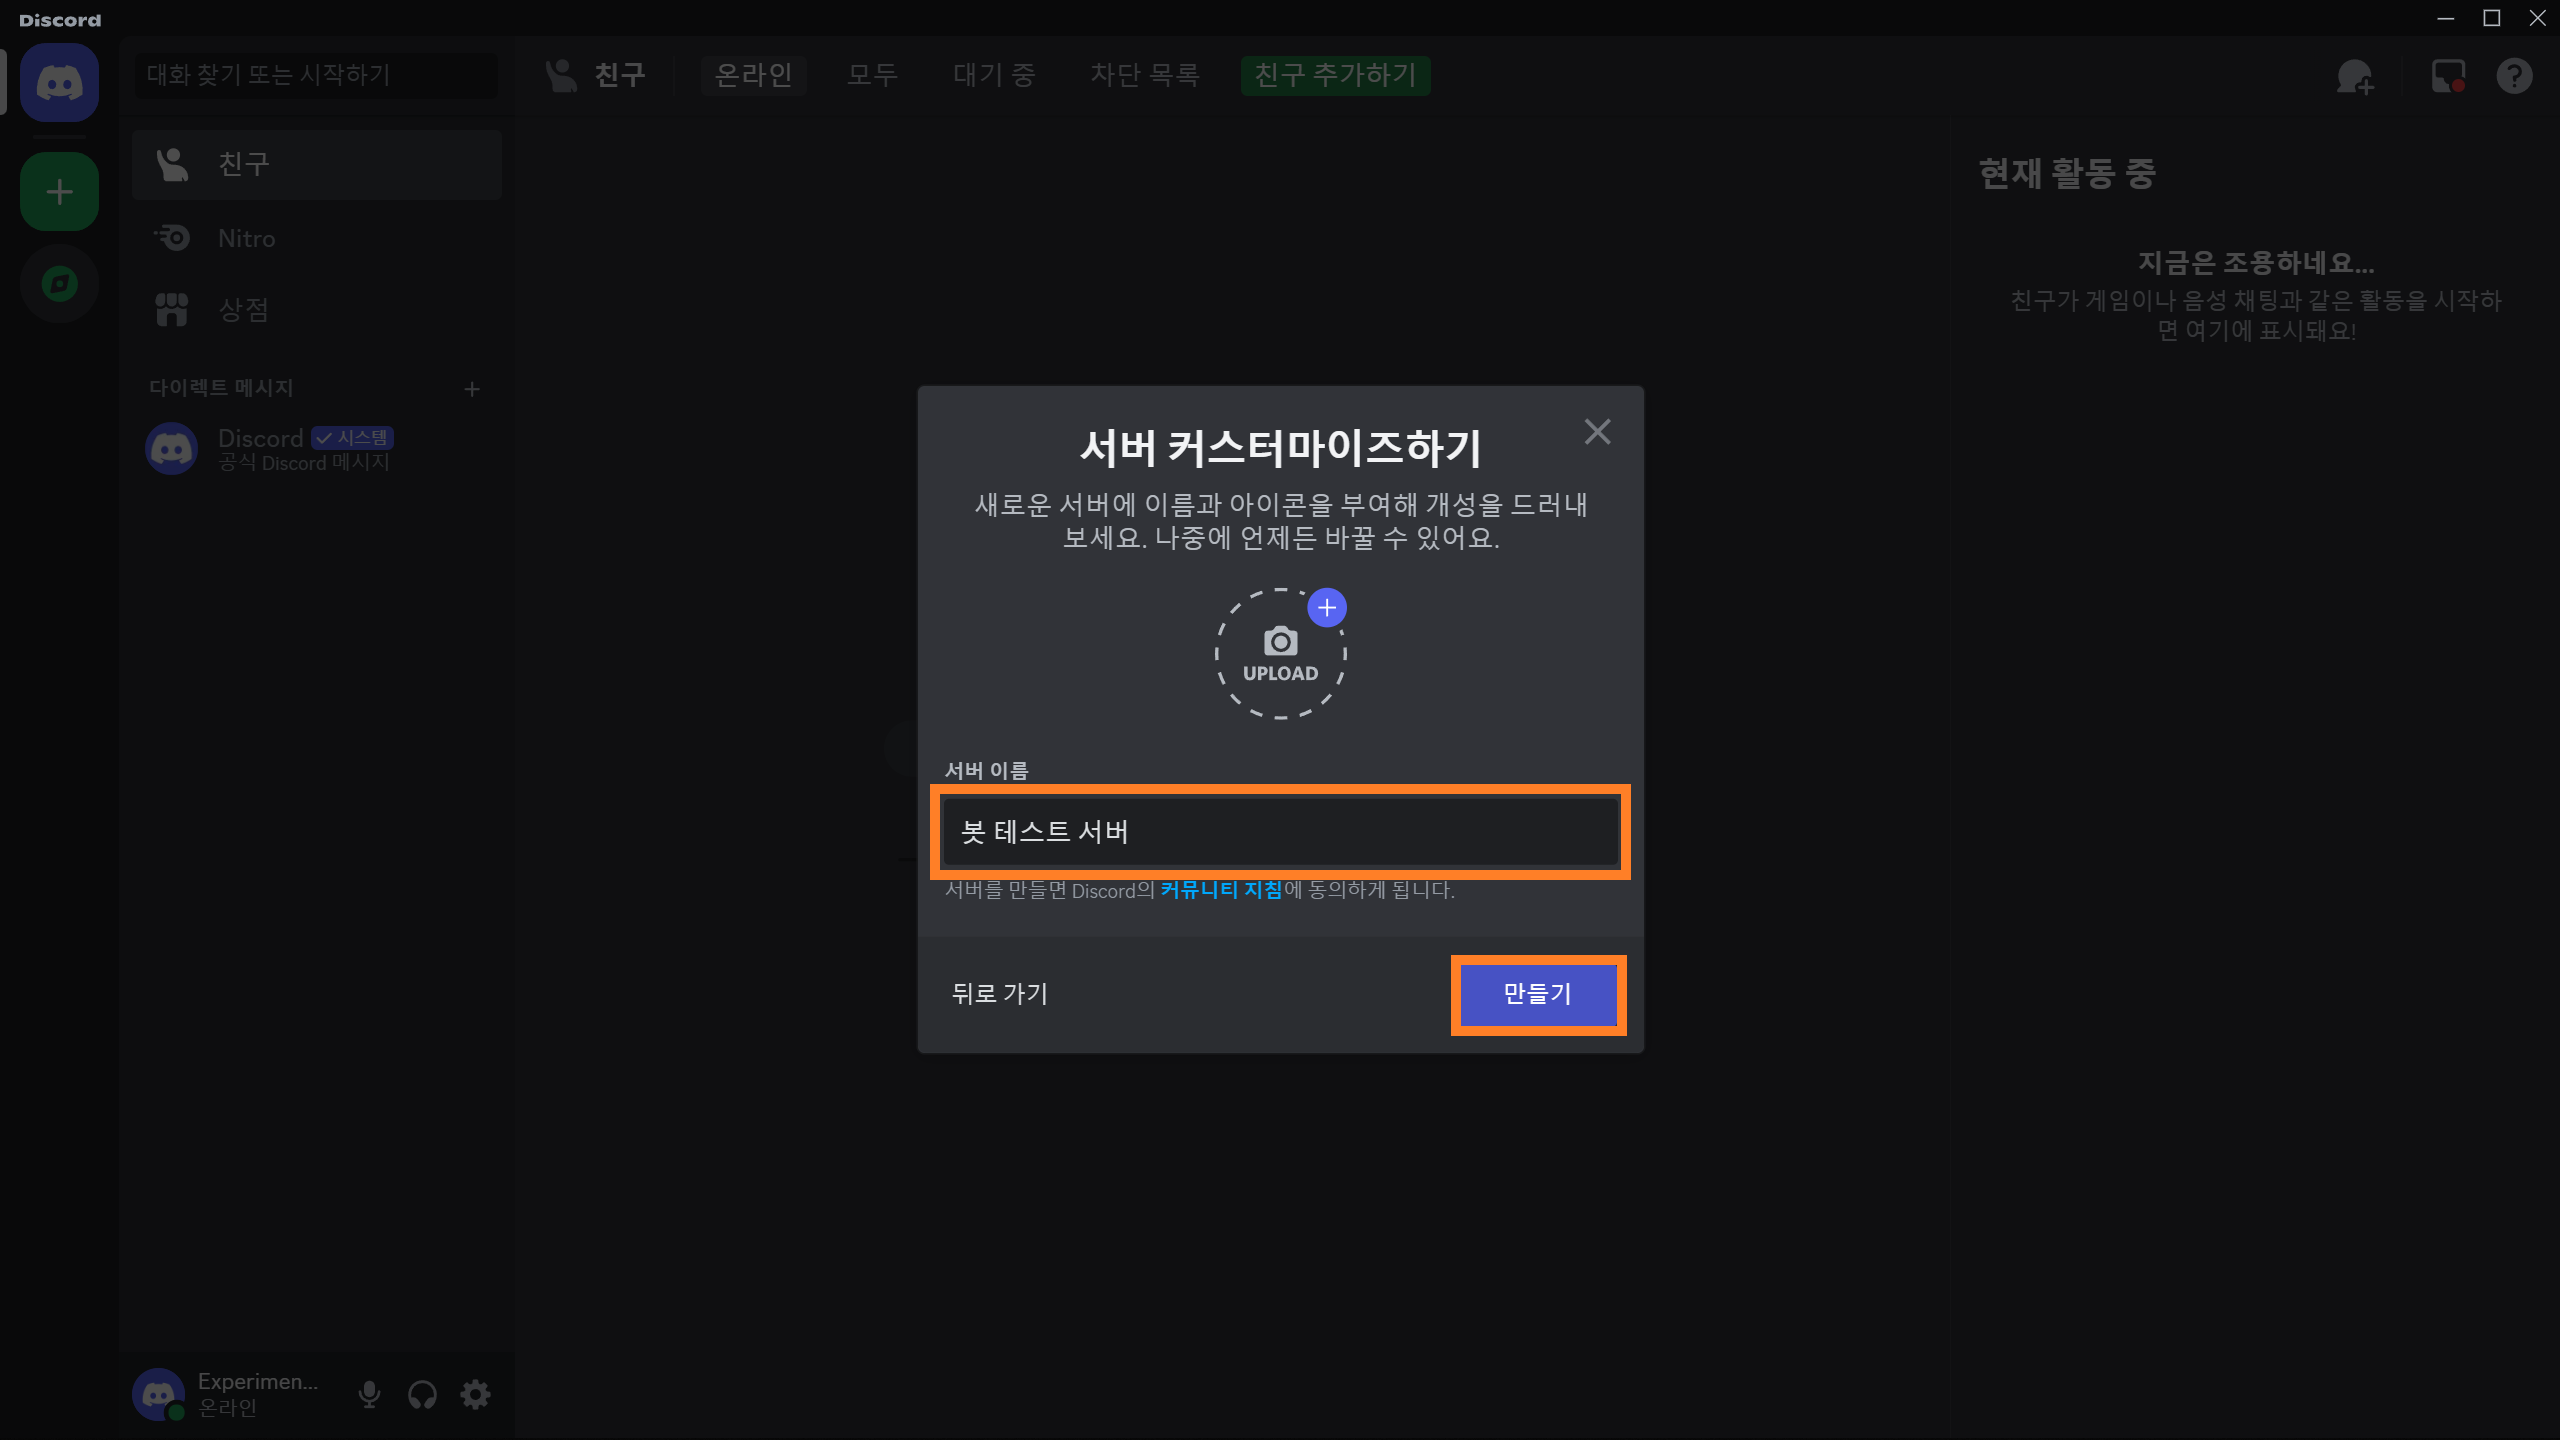
Give the guild a name and choose Create.
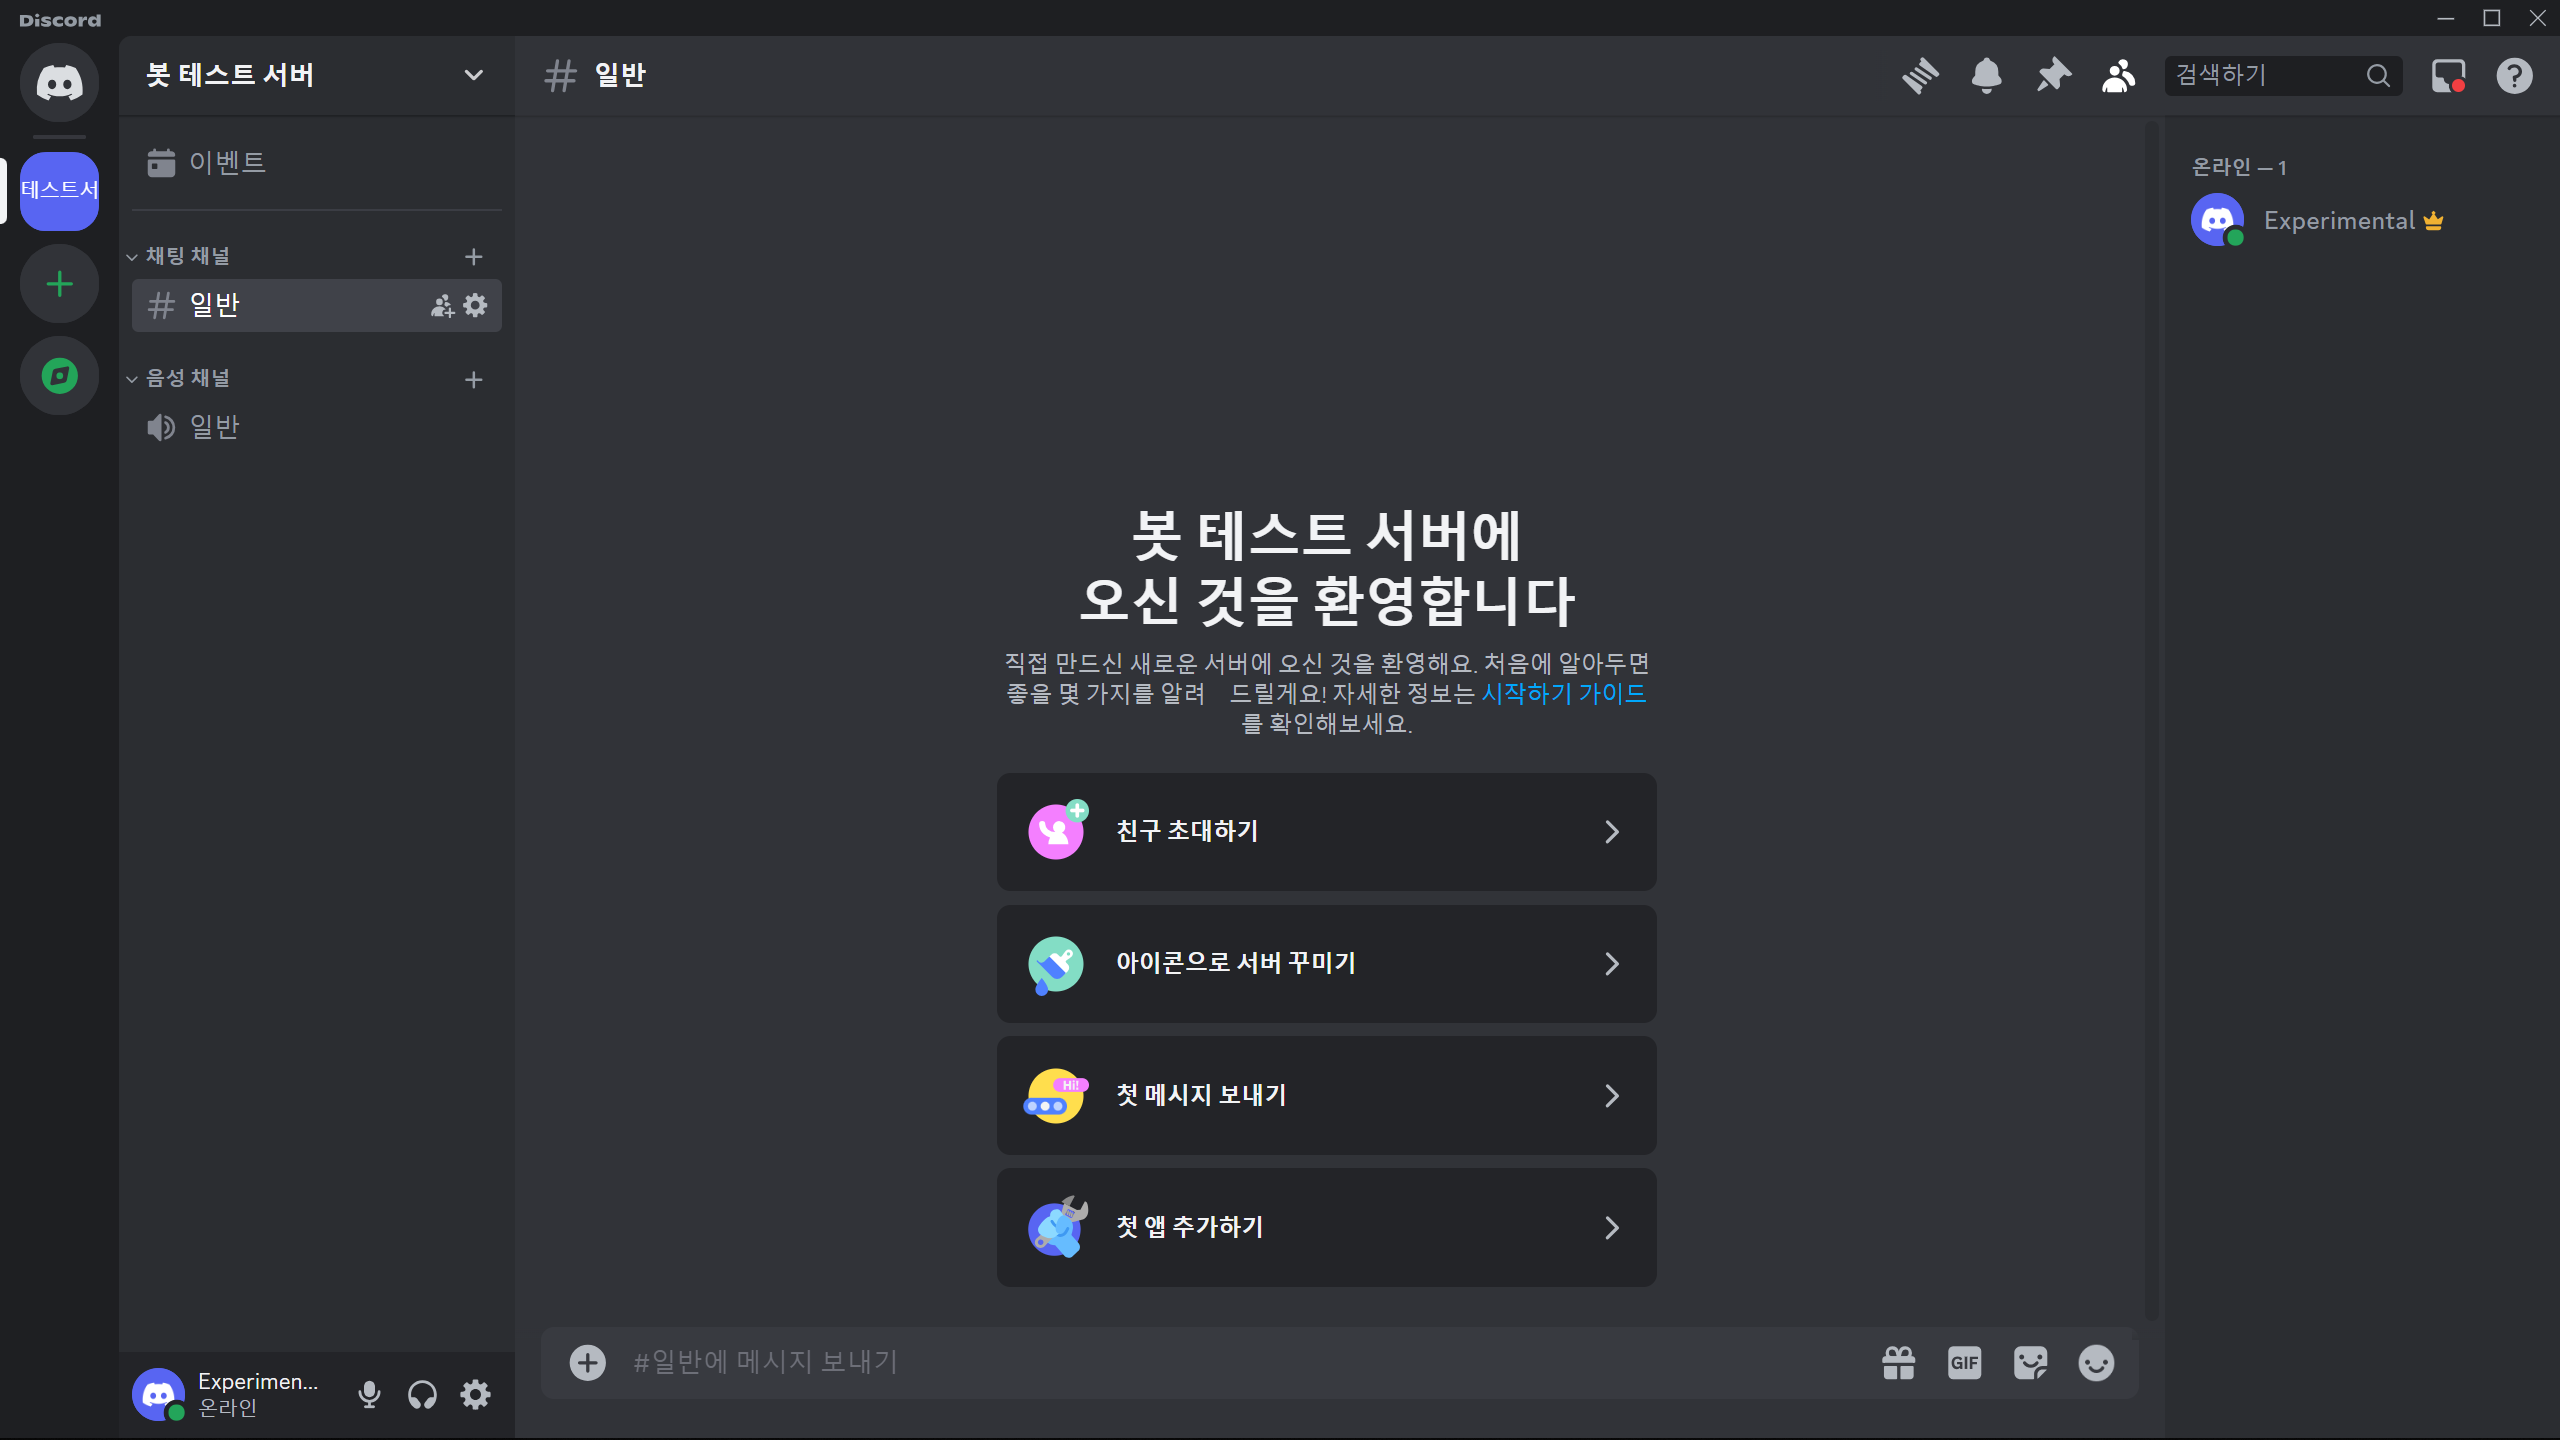
The new guild appears in the left sidebar. We can now add the bot.
3. Add the bot to the guild
Bots are installed through an authorization flow using OAuth2, rather than a regular user invitation.
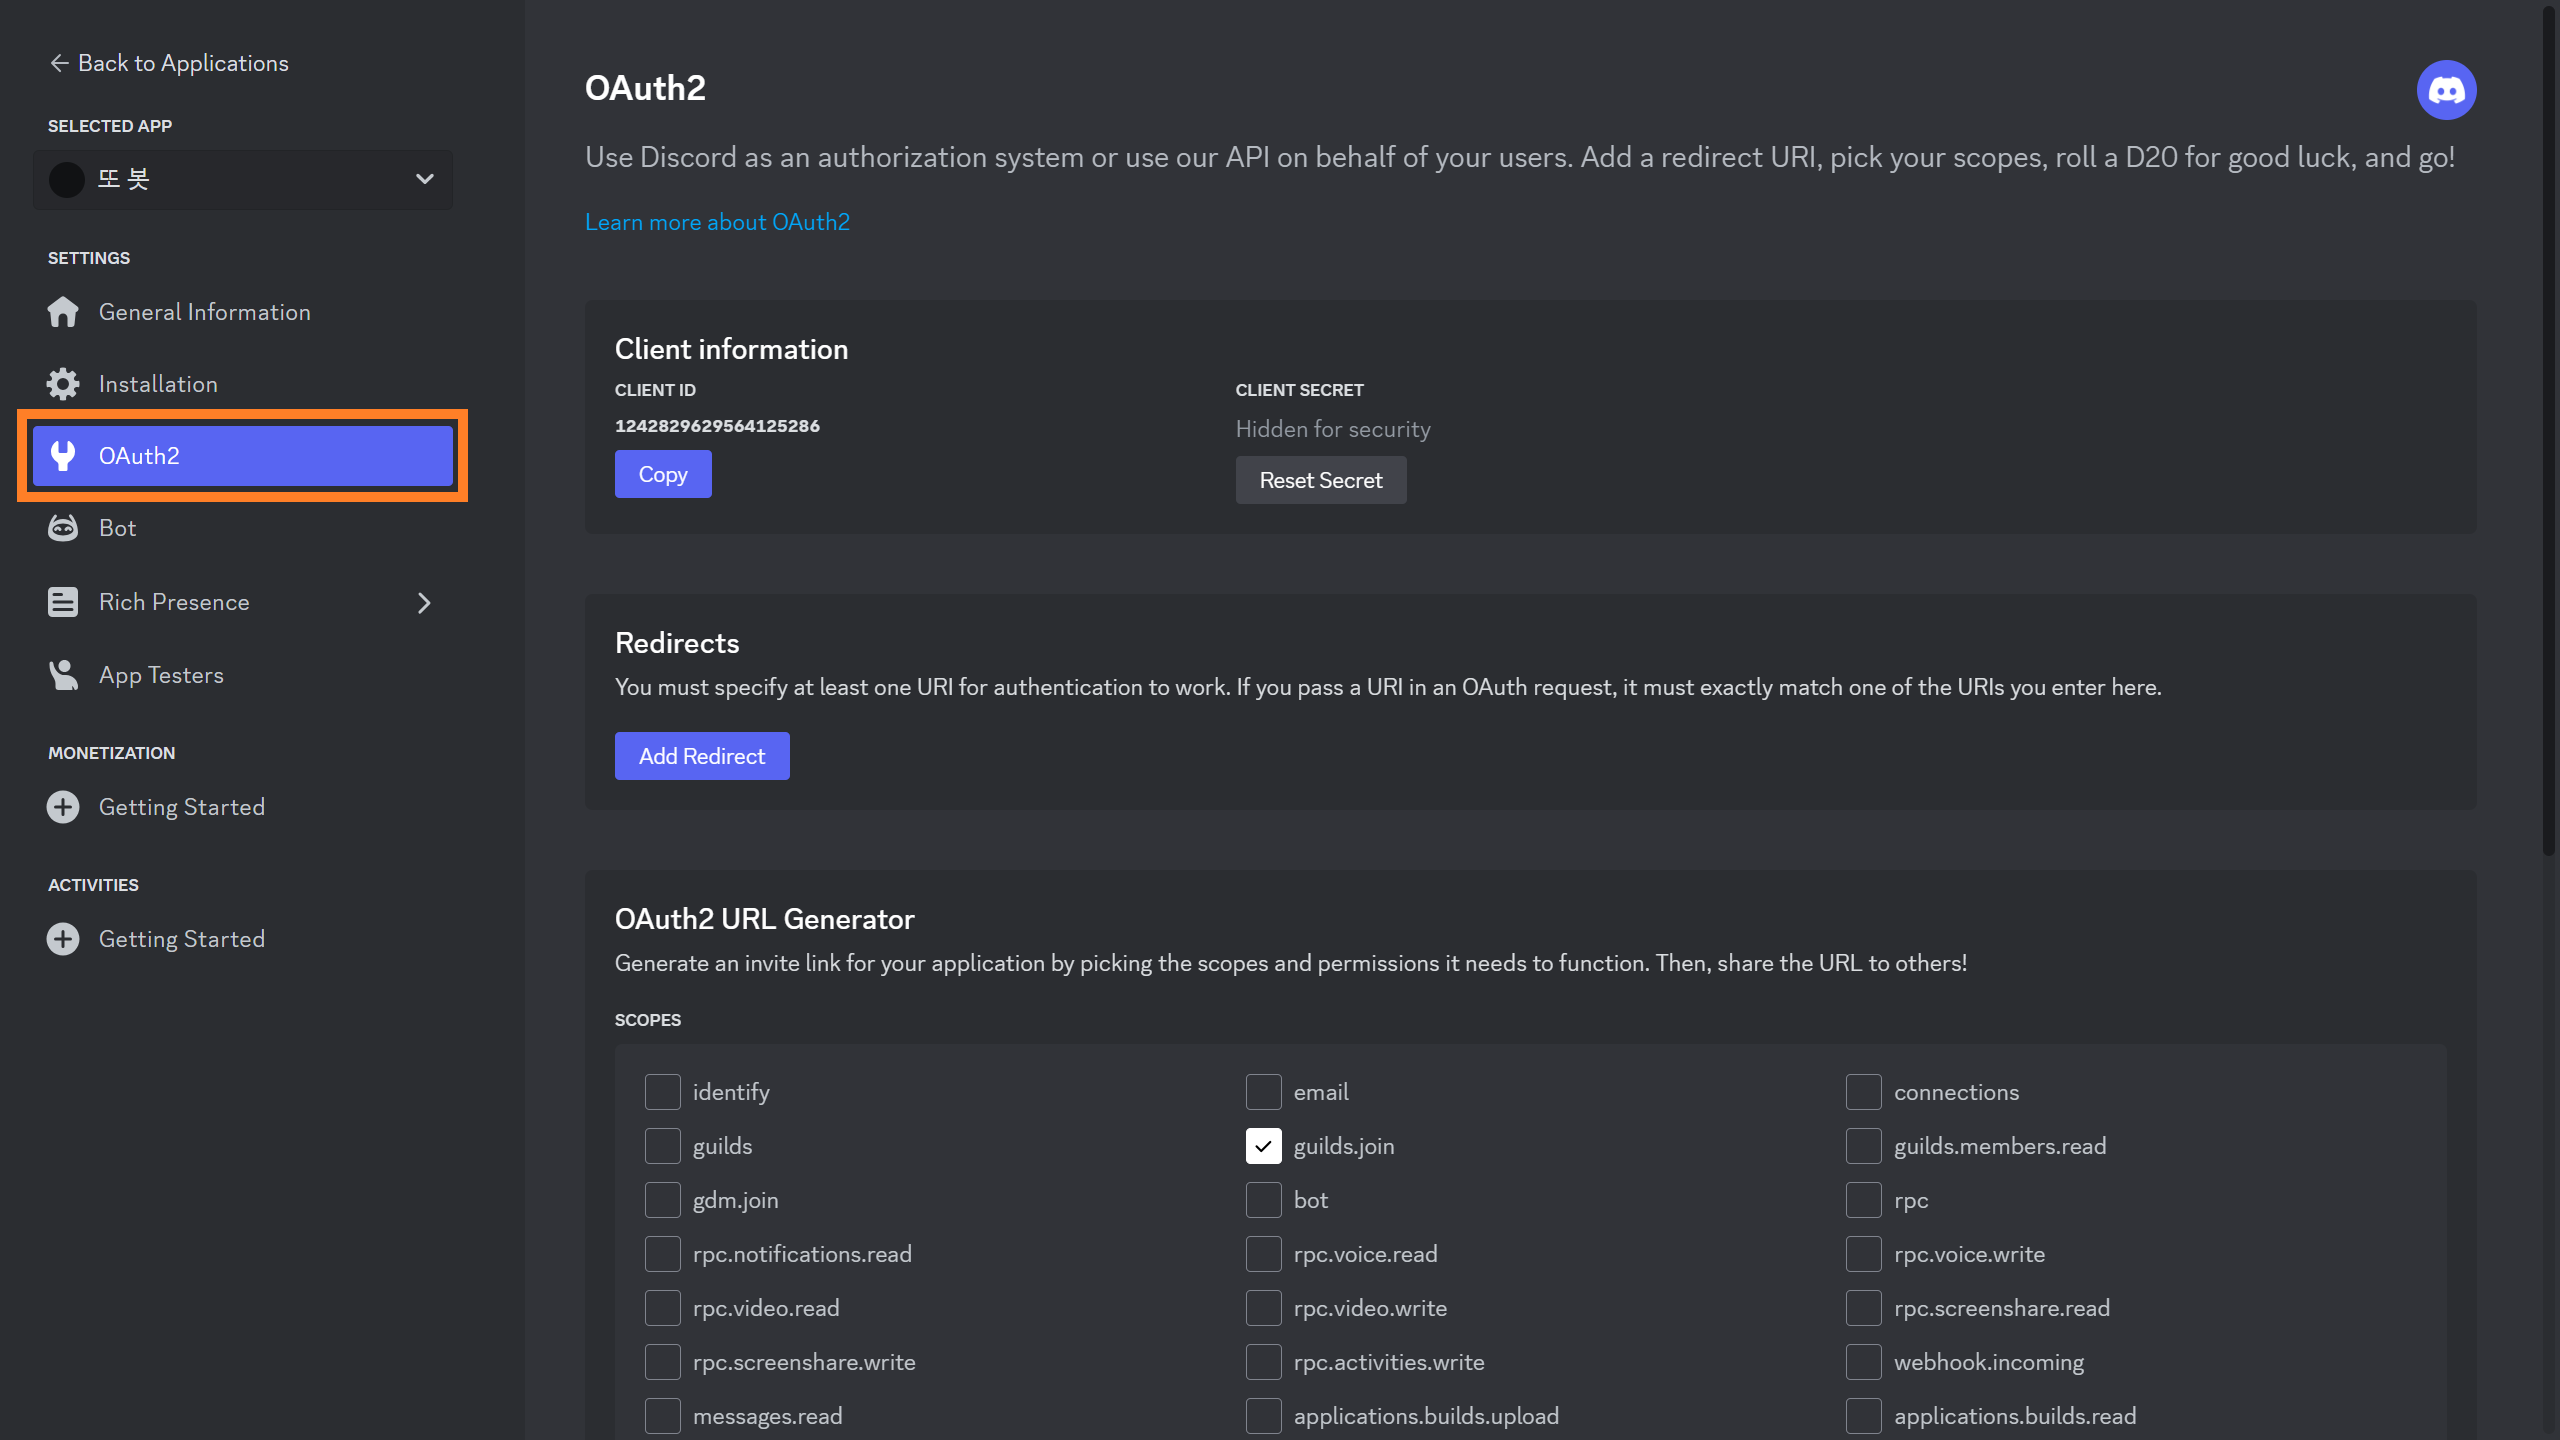
Return to the Developer Portal and open OAuth2. The OAuth2 URL Generator creates an authorization link for the application.
A scope specifies a kind of access requested by an application. For this example, use the
botscope.
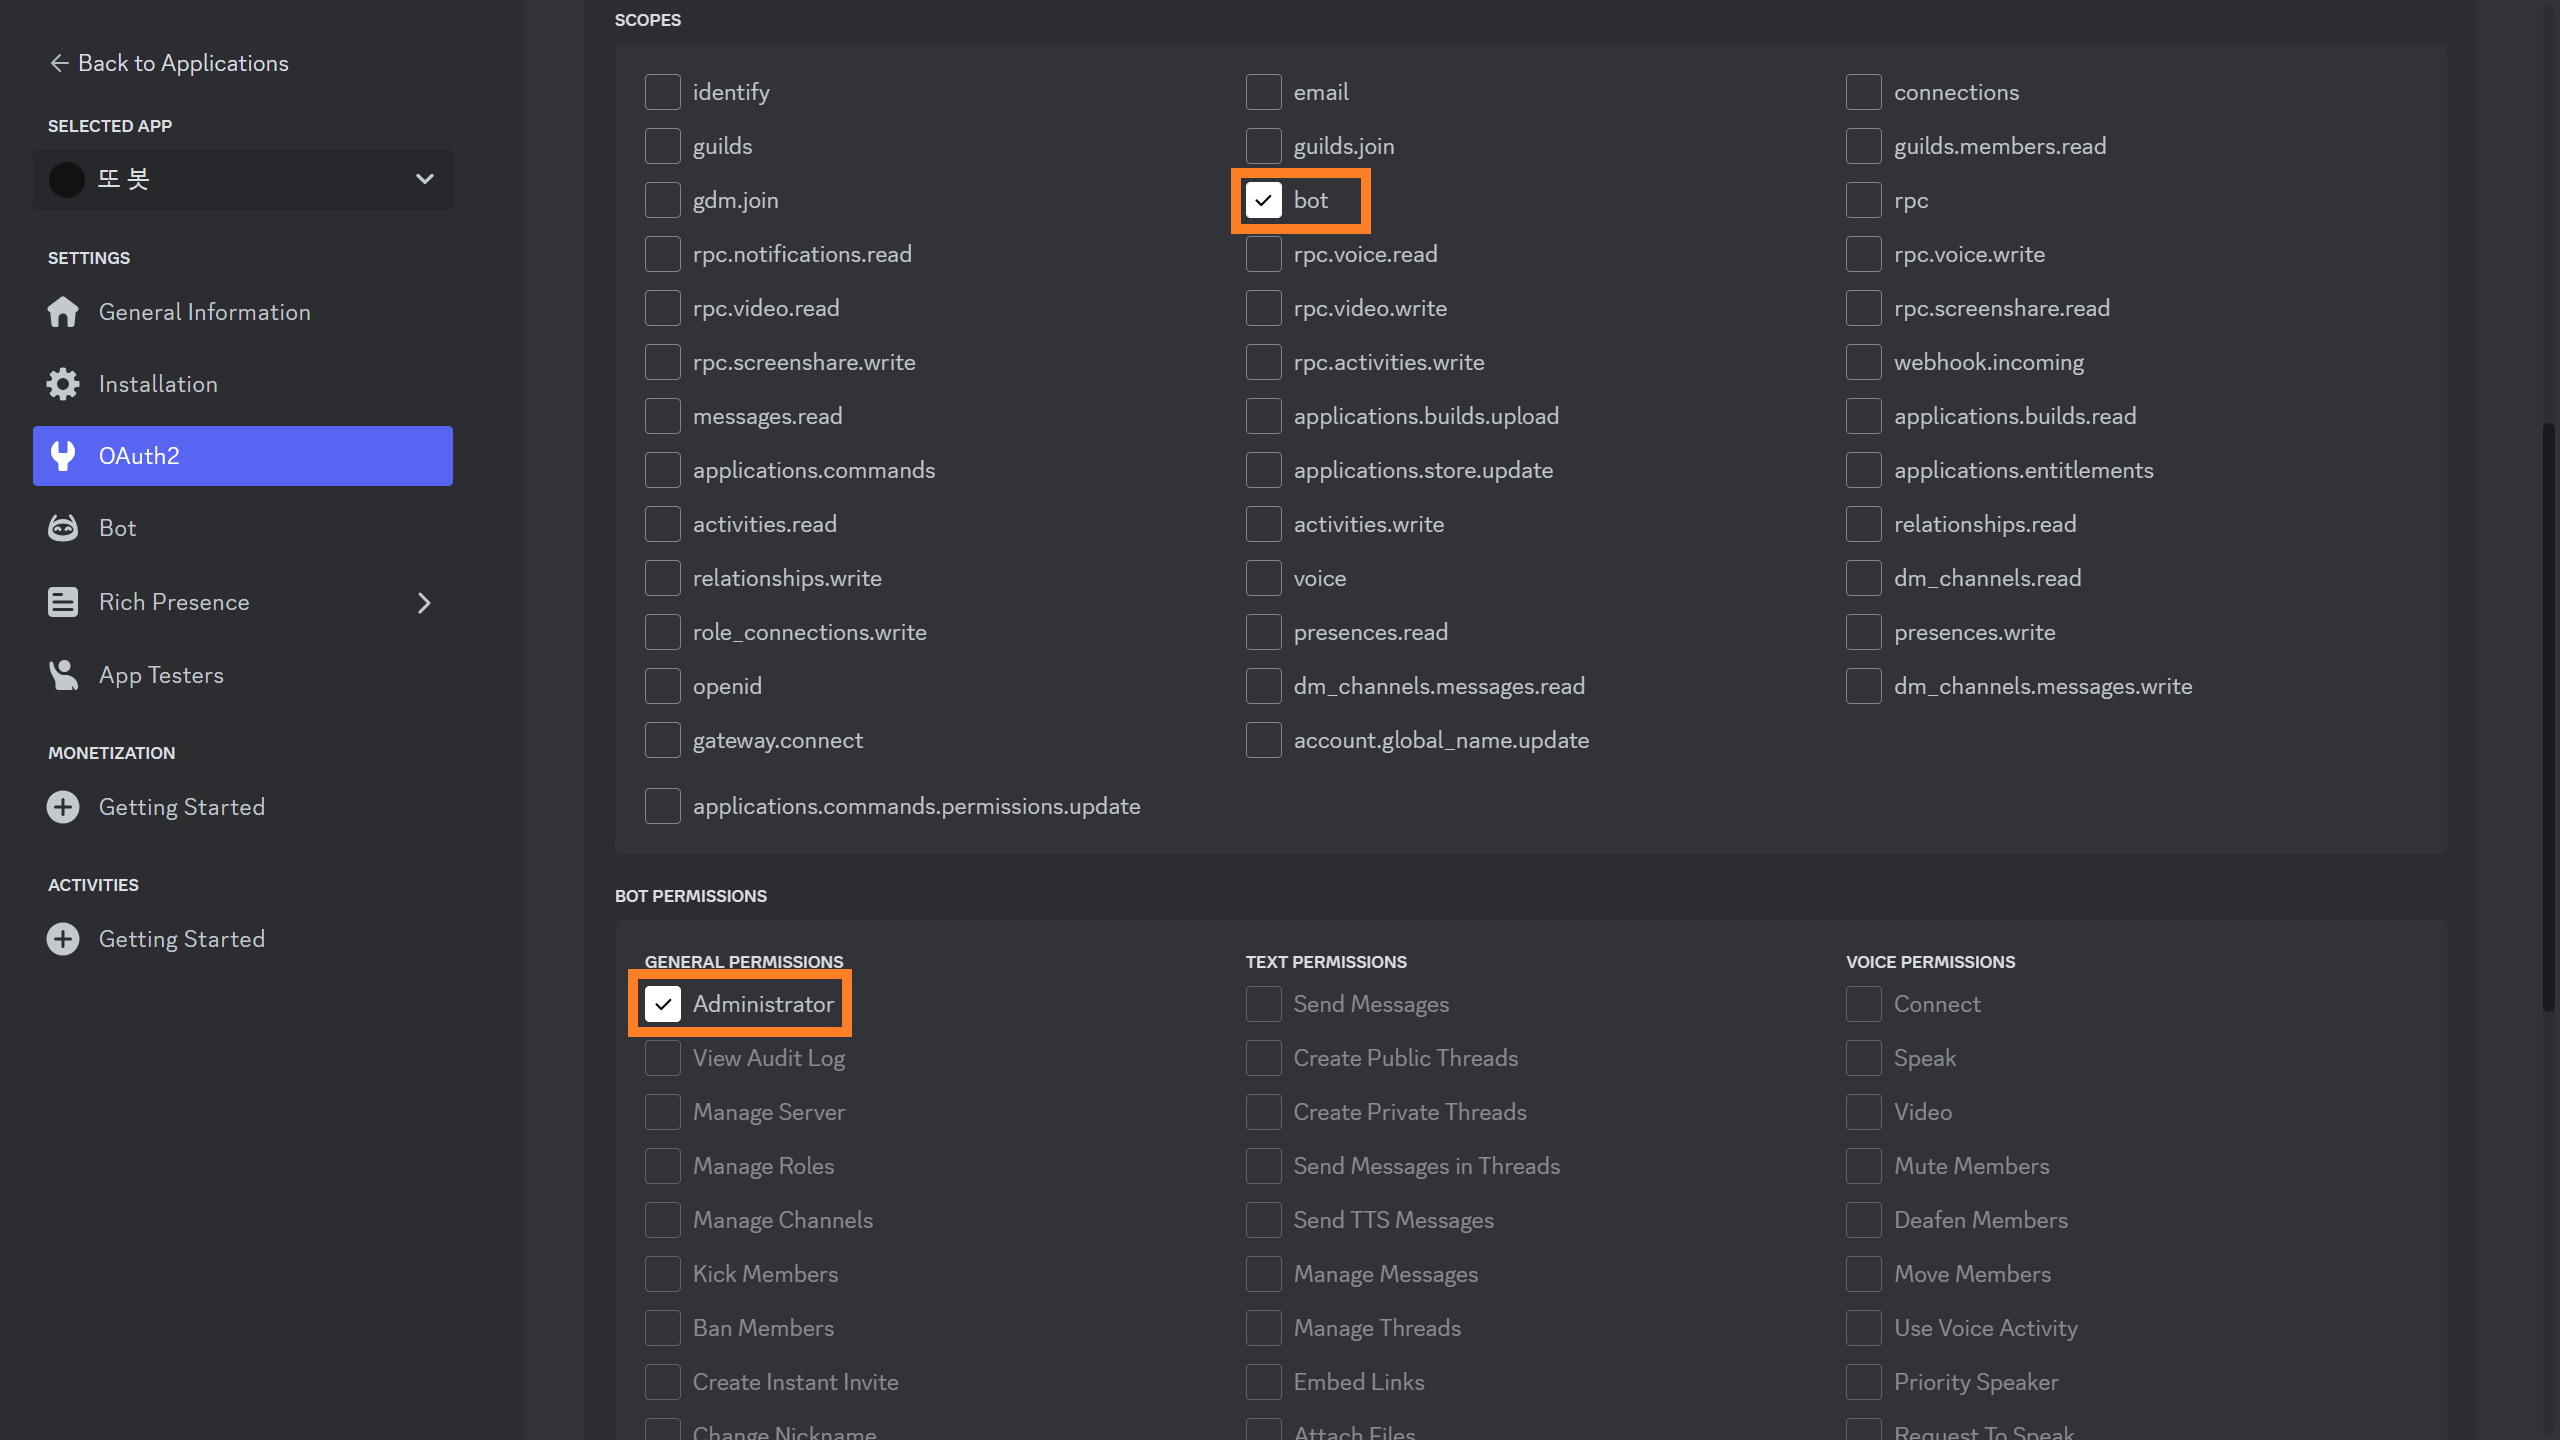
Select bot under SCOPES to reveal BOT PERMISSIONS. Choose only the permissions needed here: View Channels, Send Messages, and Read Message History. The screenshot shows Administrator, which grants all permissions; you do not need to copy that choice.
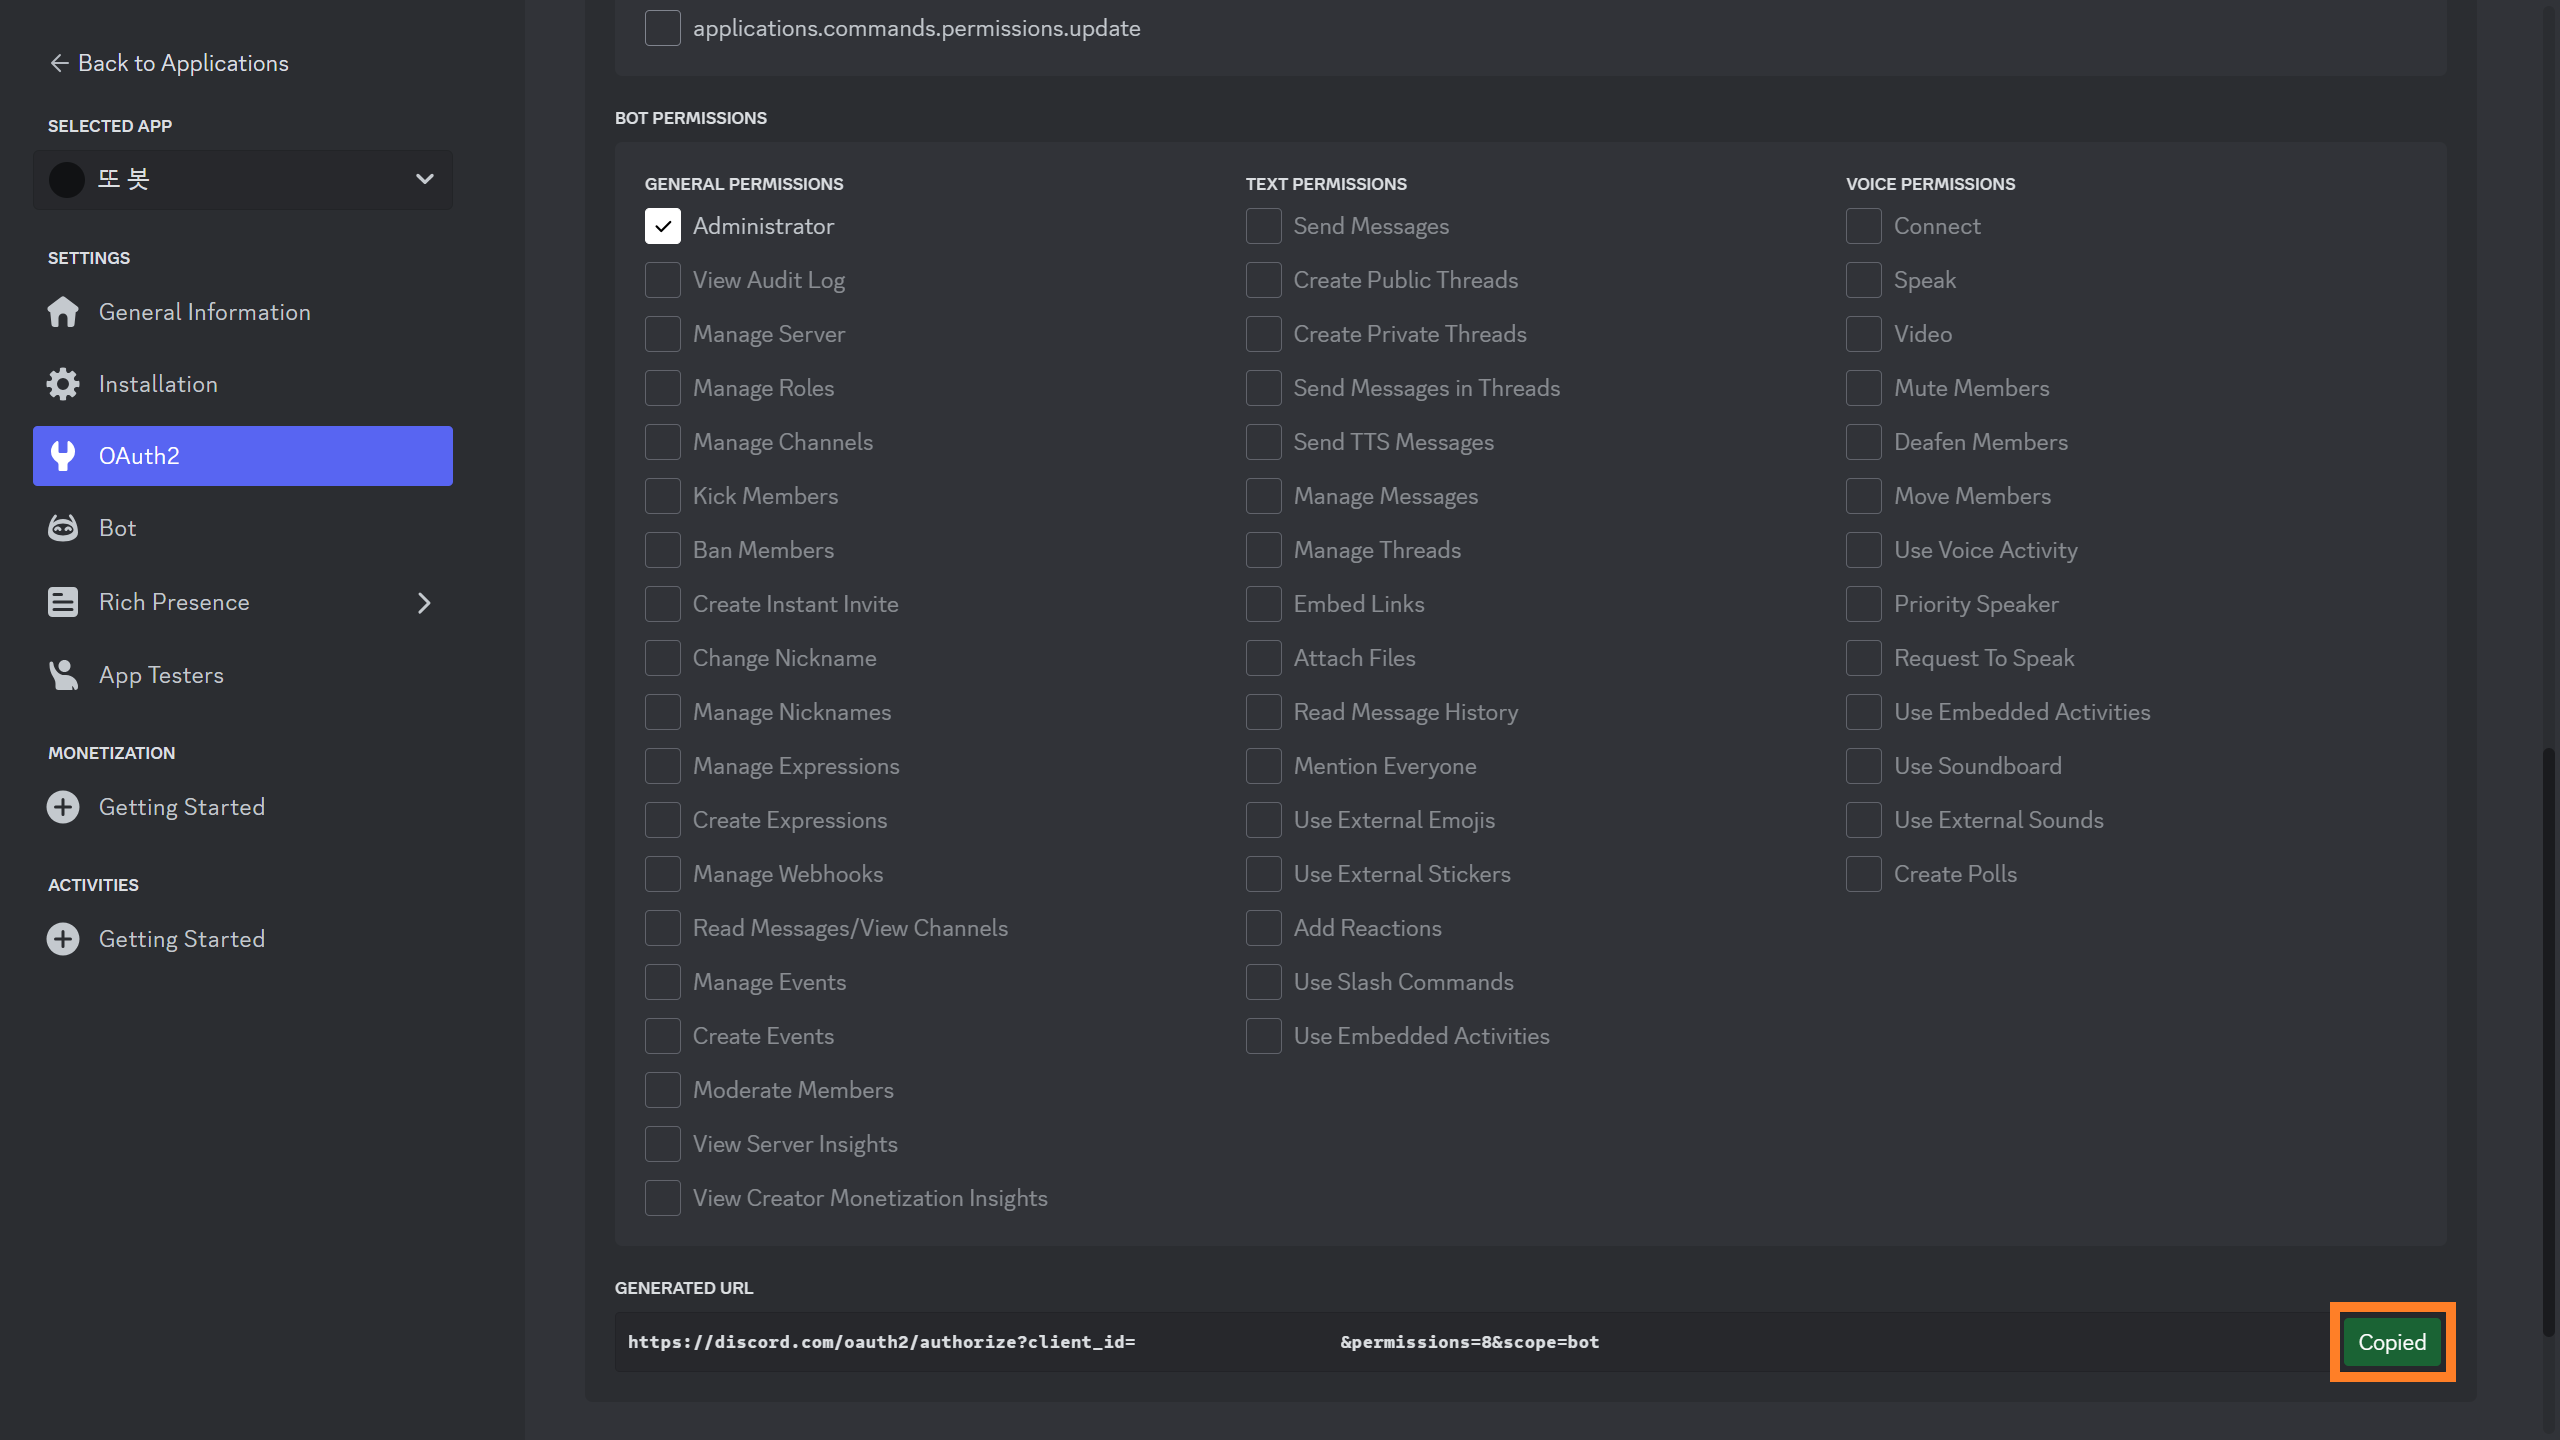
Copy the generated URL at the bottom.
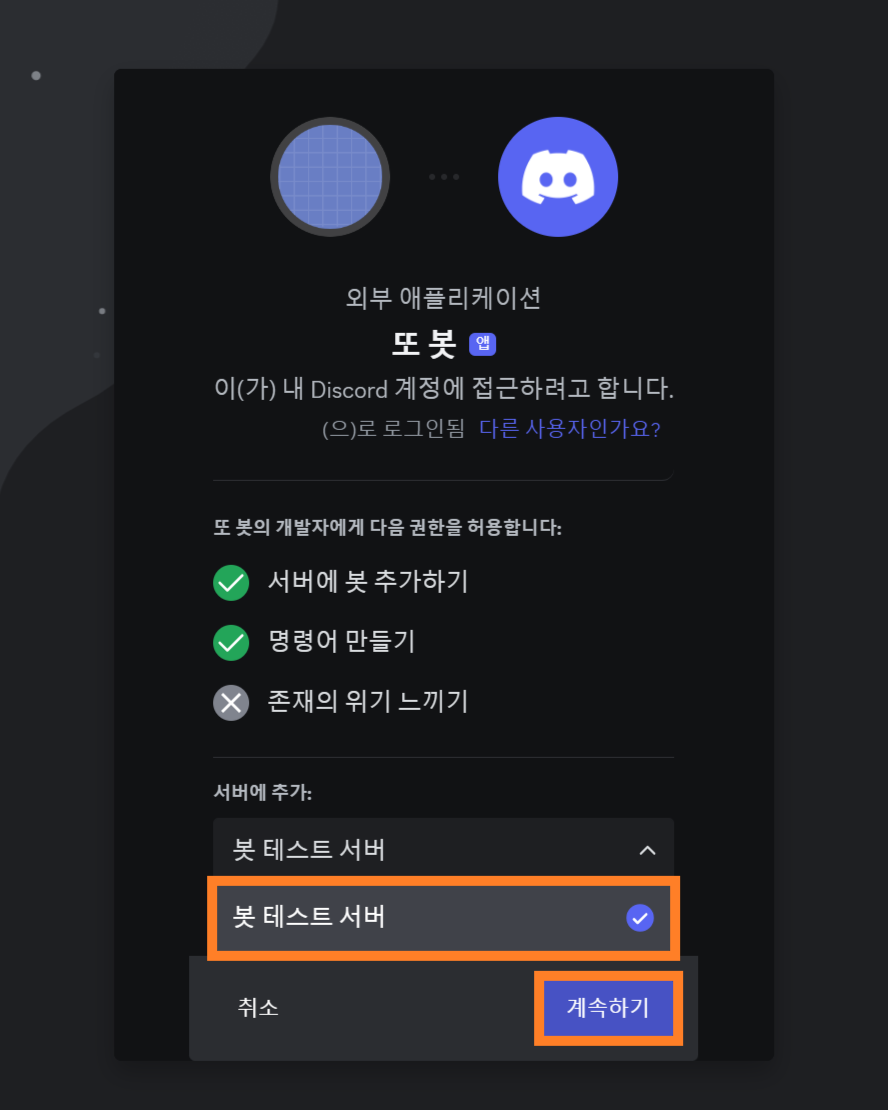
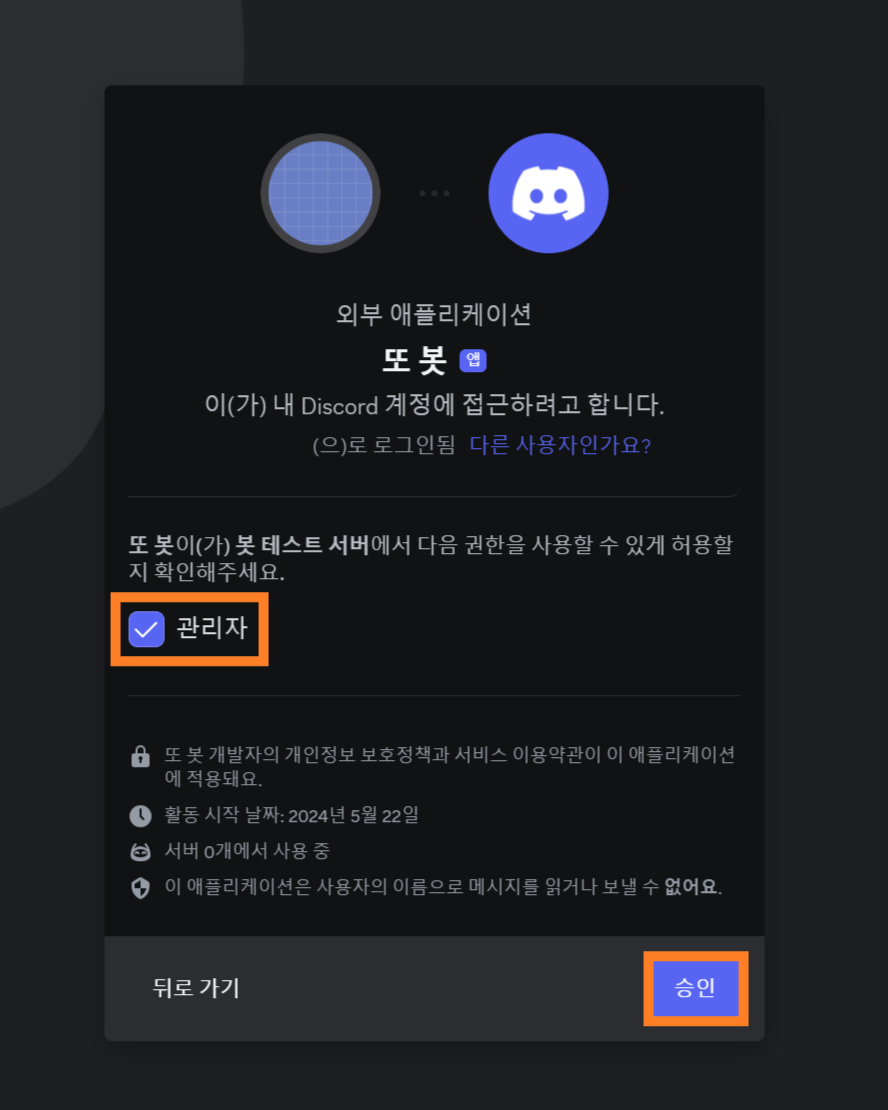
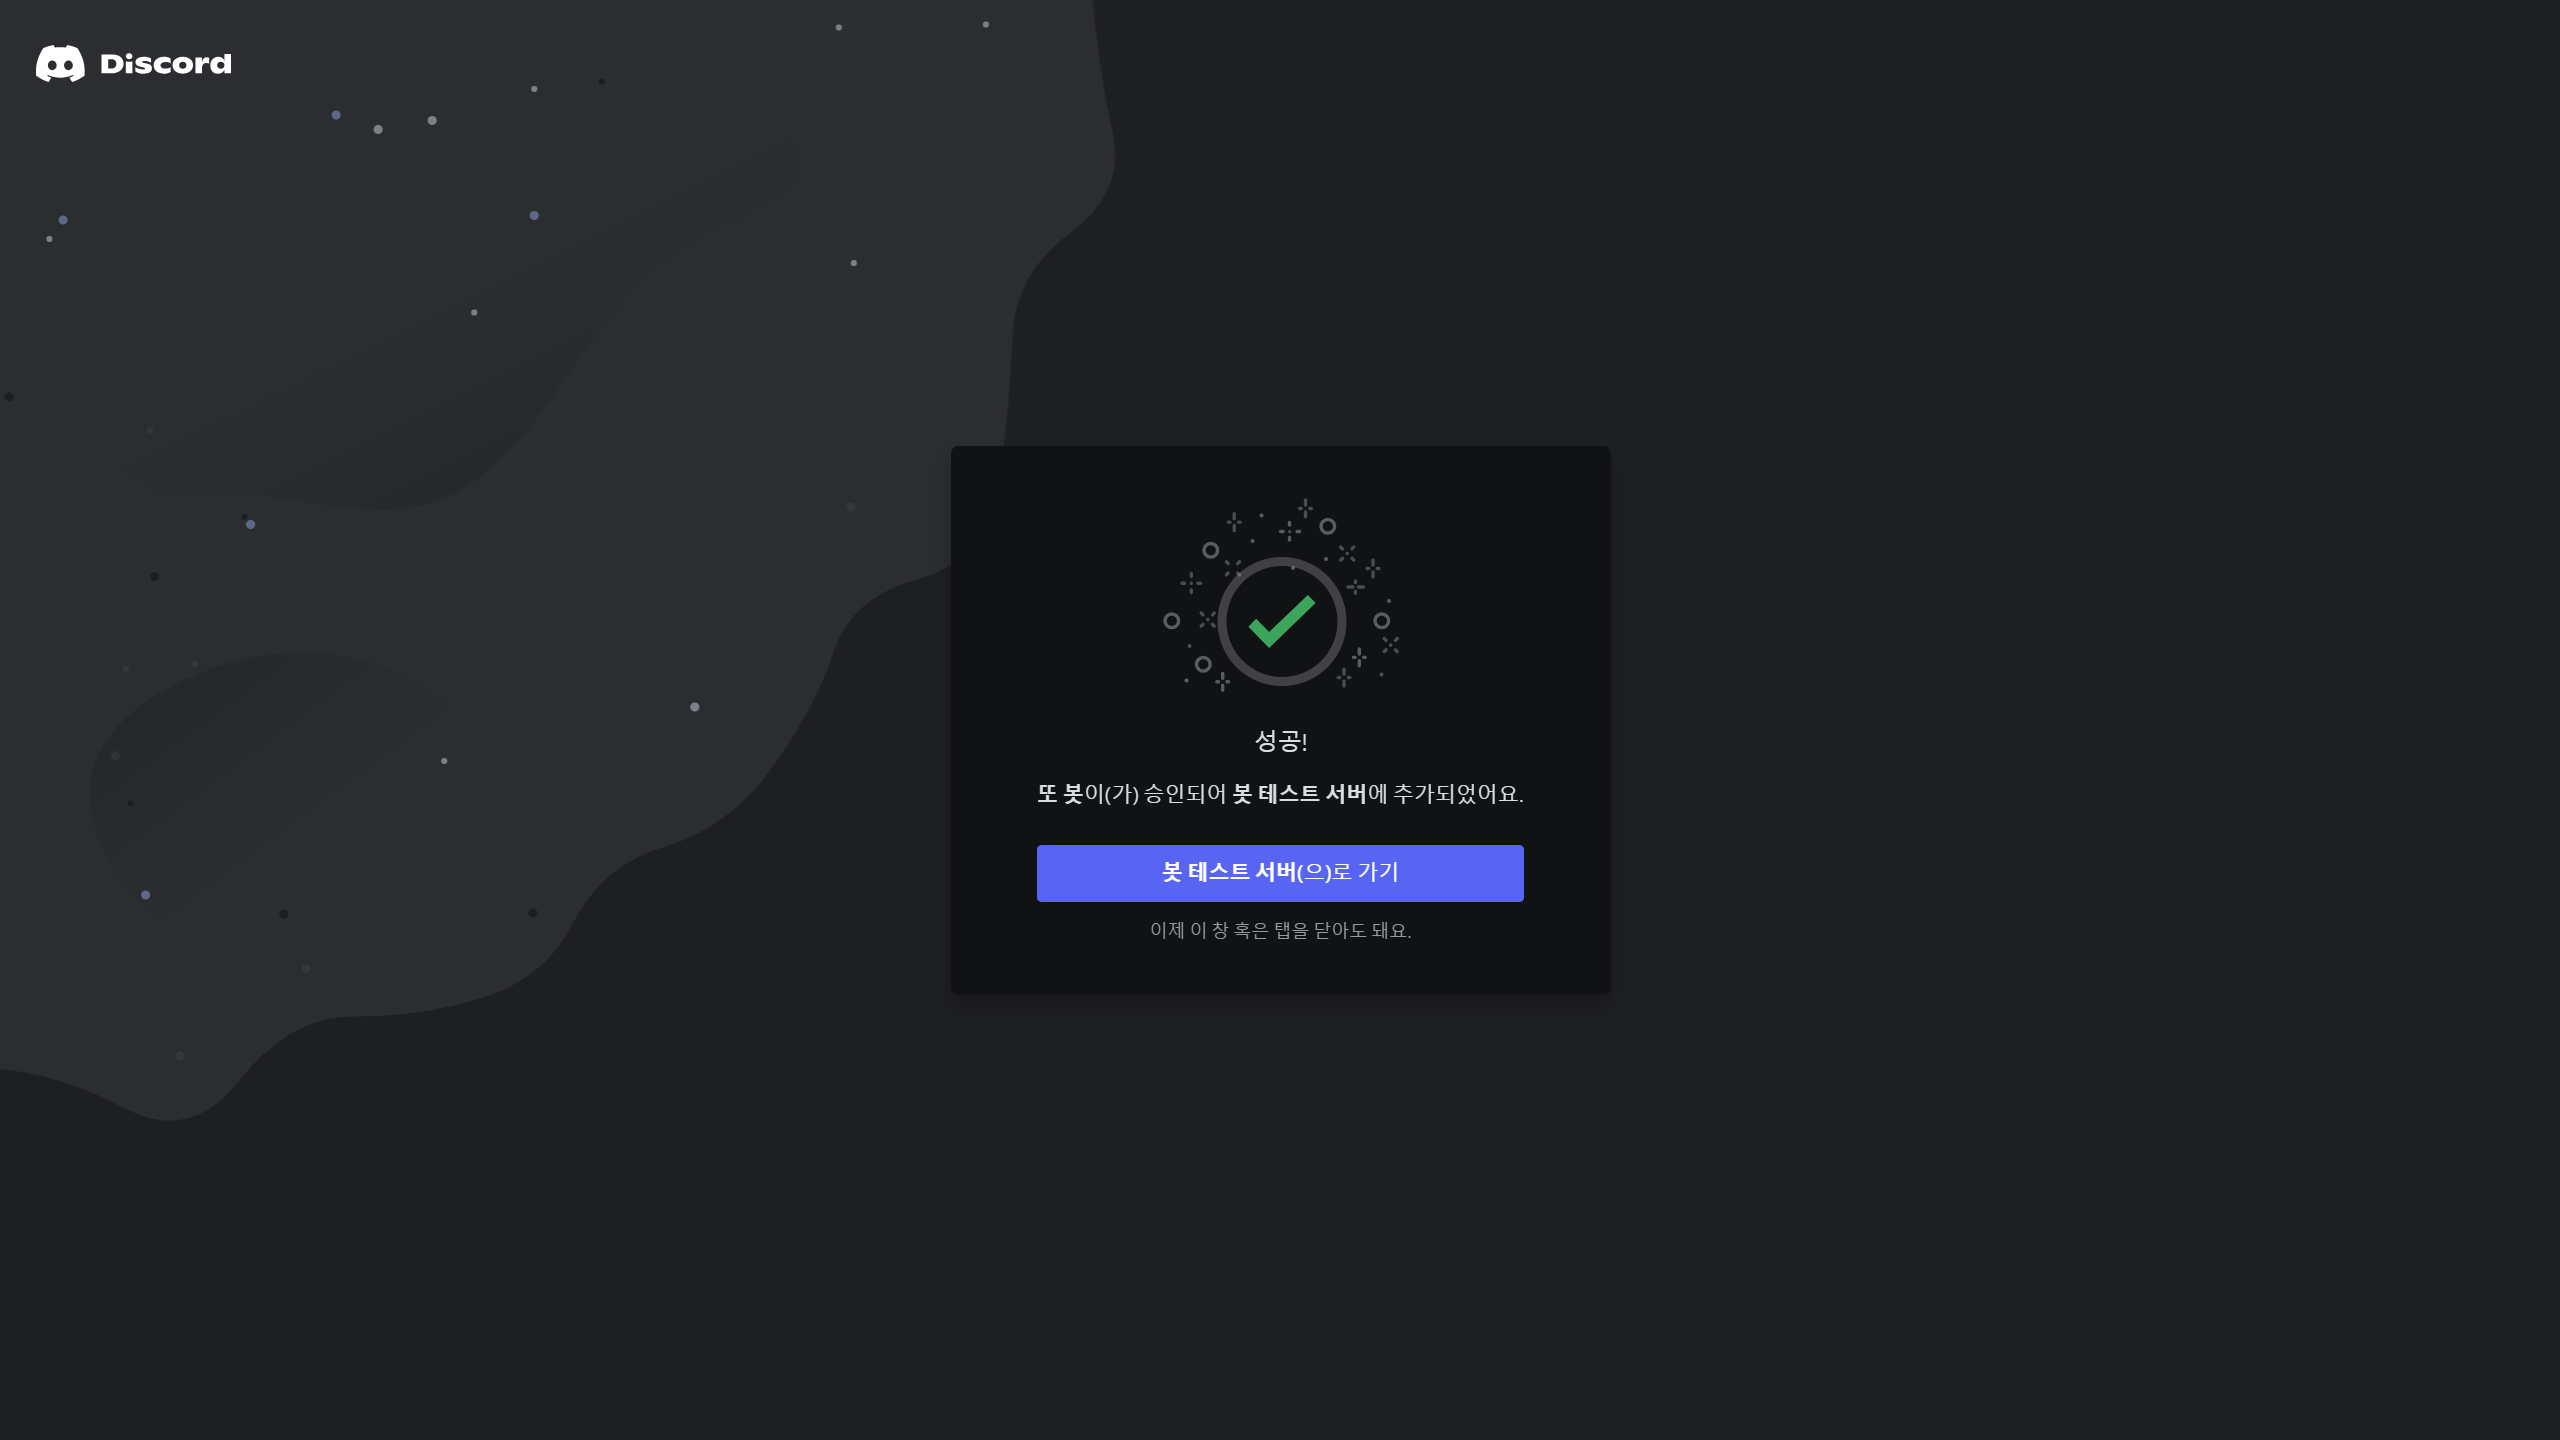
Open it in a browser, select the test guild, and continue through authorization. A success message confirms that the bot has been added.
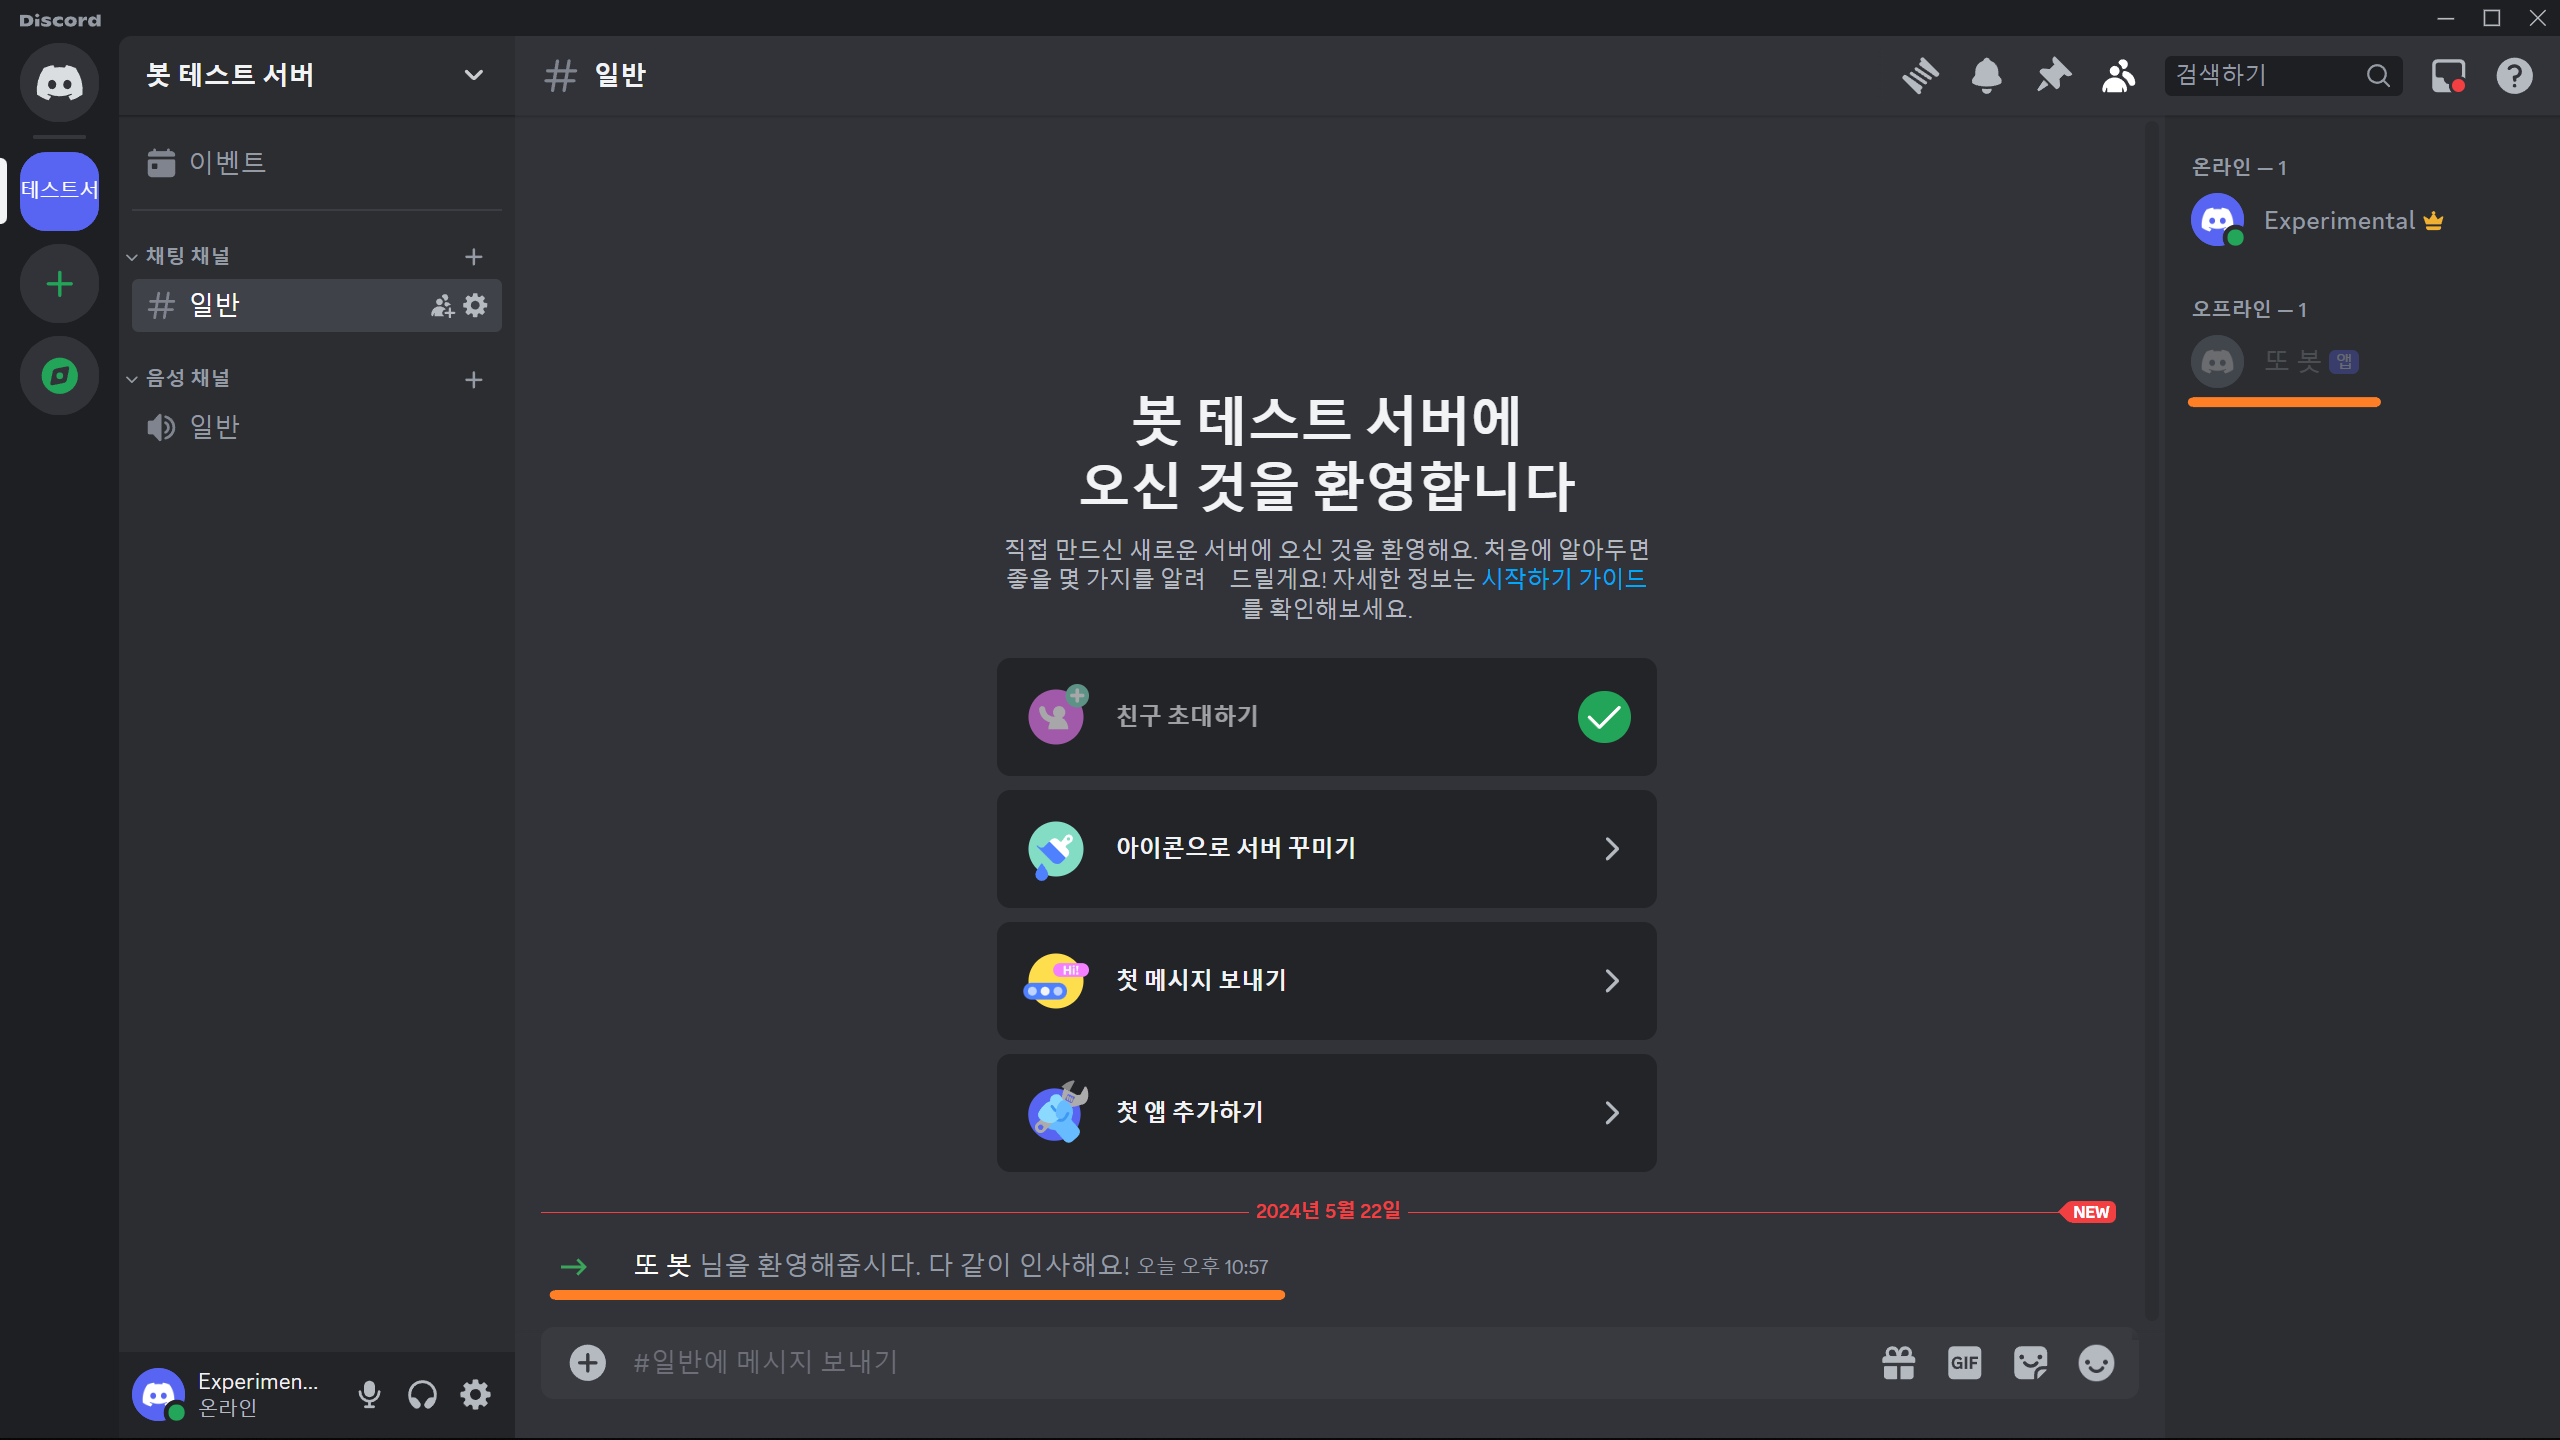
Discord displays a join message, and the bot appears offline in the member list. It is still an empty shell; next we will give it something to do.
Starting development in Python
We will use the discord.py library. Its asynchronous API uses coroutines to handle I/O without making every operation block the rest of the bot.
1. Install the library
Install discord.py with pip:
1
$ pip install -U discord.py
2. Connect the bot to Discord
To receive commands and respond, the program must connect to Discord. We will start with Client.
discord.Client represents the connection and provides access to Discord’s WebSocket events and API. This example comes from the library’s quick start.
1
2
3
4
5
6
7
8
9
10
11
12
13
14
15
16
17
18
19
20
21
22
# This example requires the 'message_content' intent.

import discord

intents = discord.Intents.default()
intents.message_content = True

client = discord.Client(intents=intents)

@client.event
async def on_ready():
    print(f'We have logged in as {client.user}')

@client.event
async def on_message(message):
    if message.author == client.user:
        return

    if message.content.startswith('$hello'):
        await message.channel.send('Hello!')

client.run('your token here')
The code creates client and registers handlers for the events on_ready() and on_message(). Events represent things that happen, such as receiving a message or creating a channel. on_ready() runs when the client is ready to work with Discord; on_message() handles messages visible to the bot.
See the event reference for other available events.
Event handlers alone do not identify which bot to run. We also need the bot’s token, a secret used to authenticate API access.
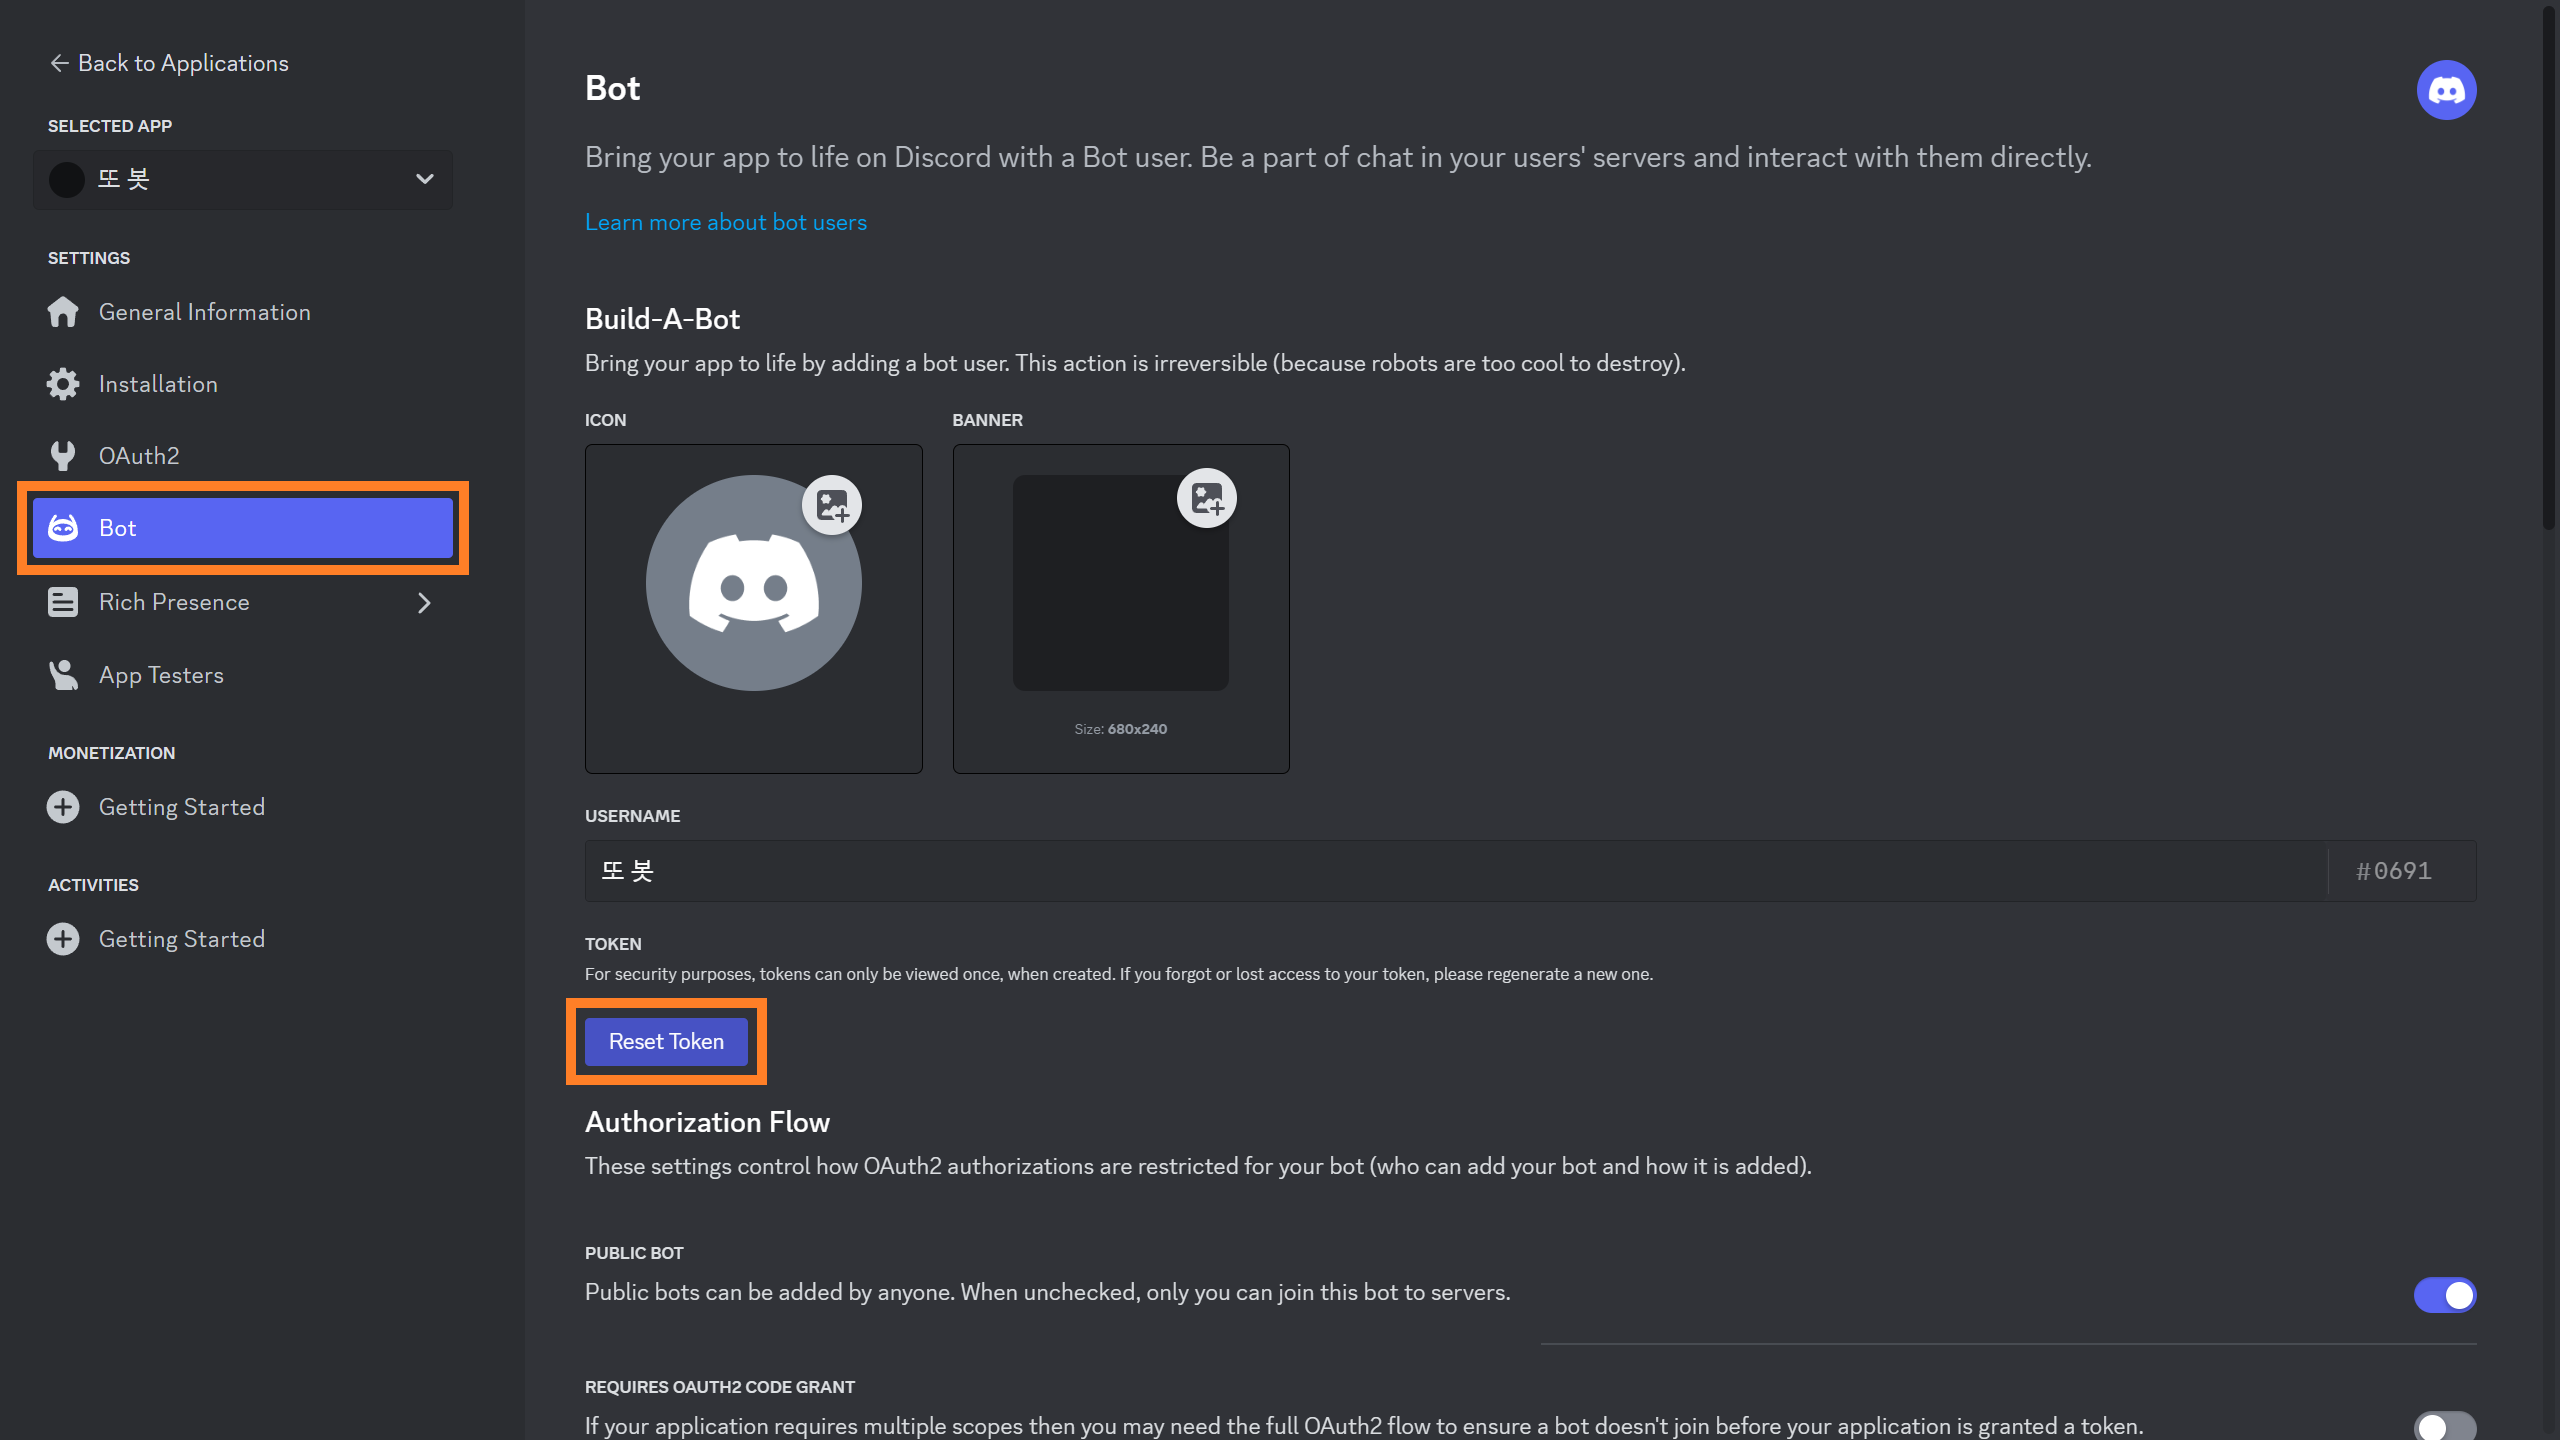
In the portal’s Bot tab, choose Reset Token.
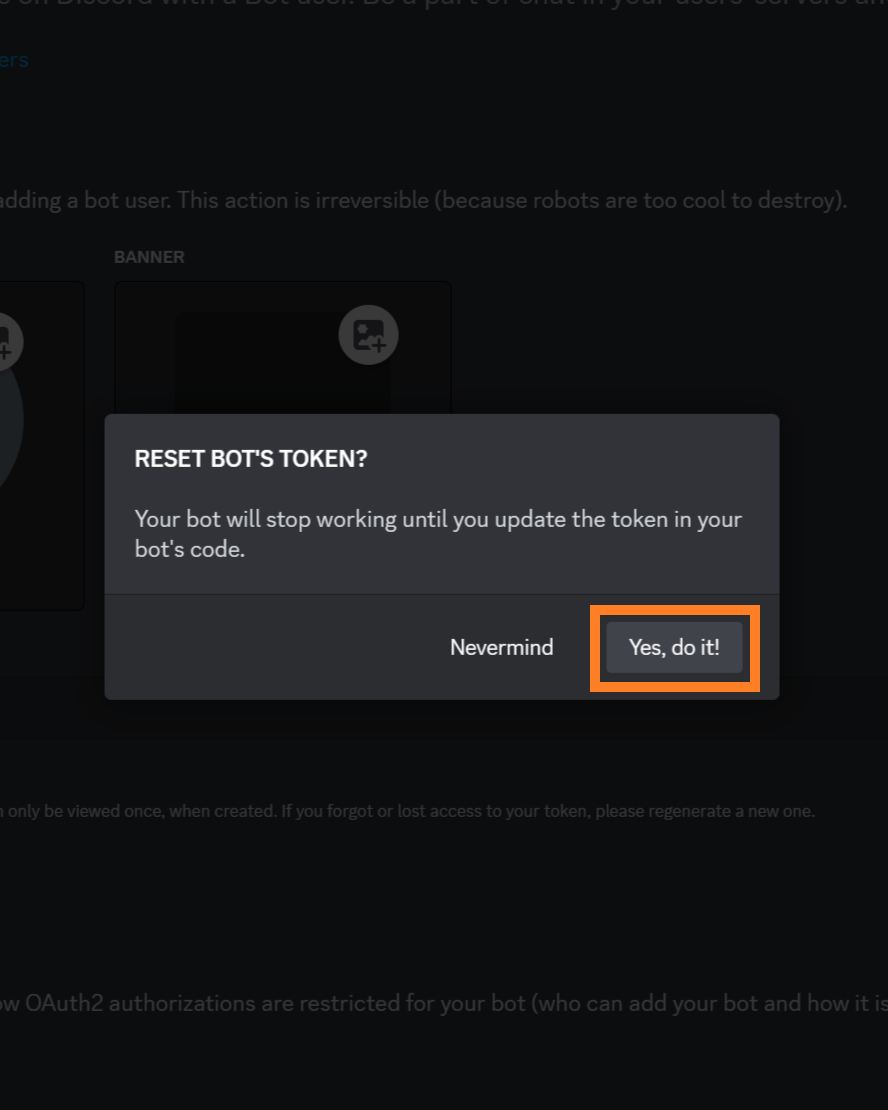
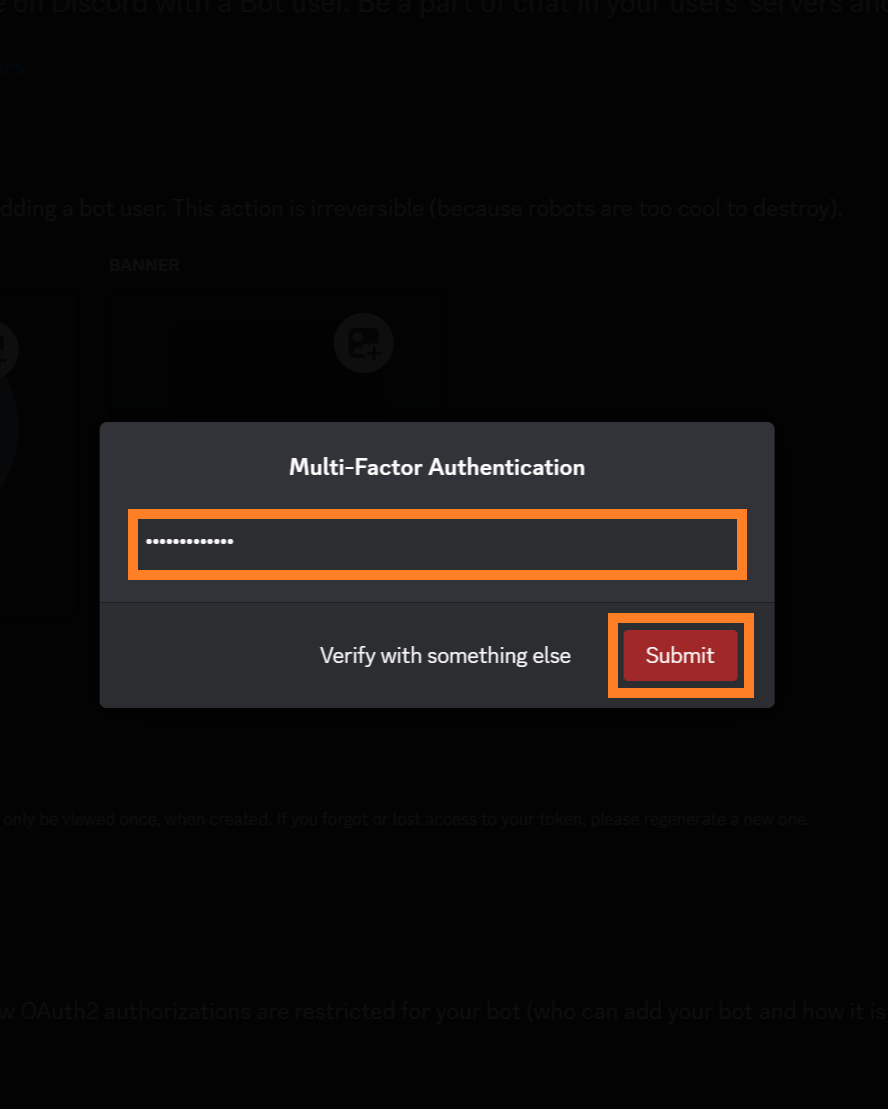
Confirm the reset and complete the requested account verification.
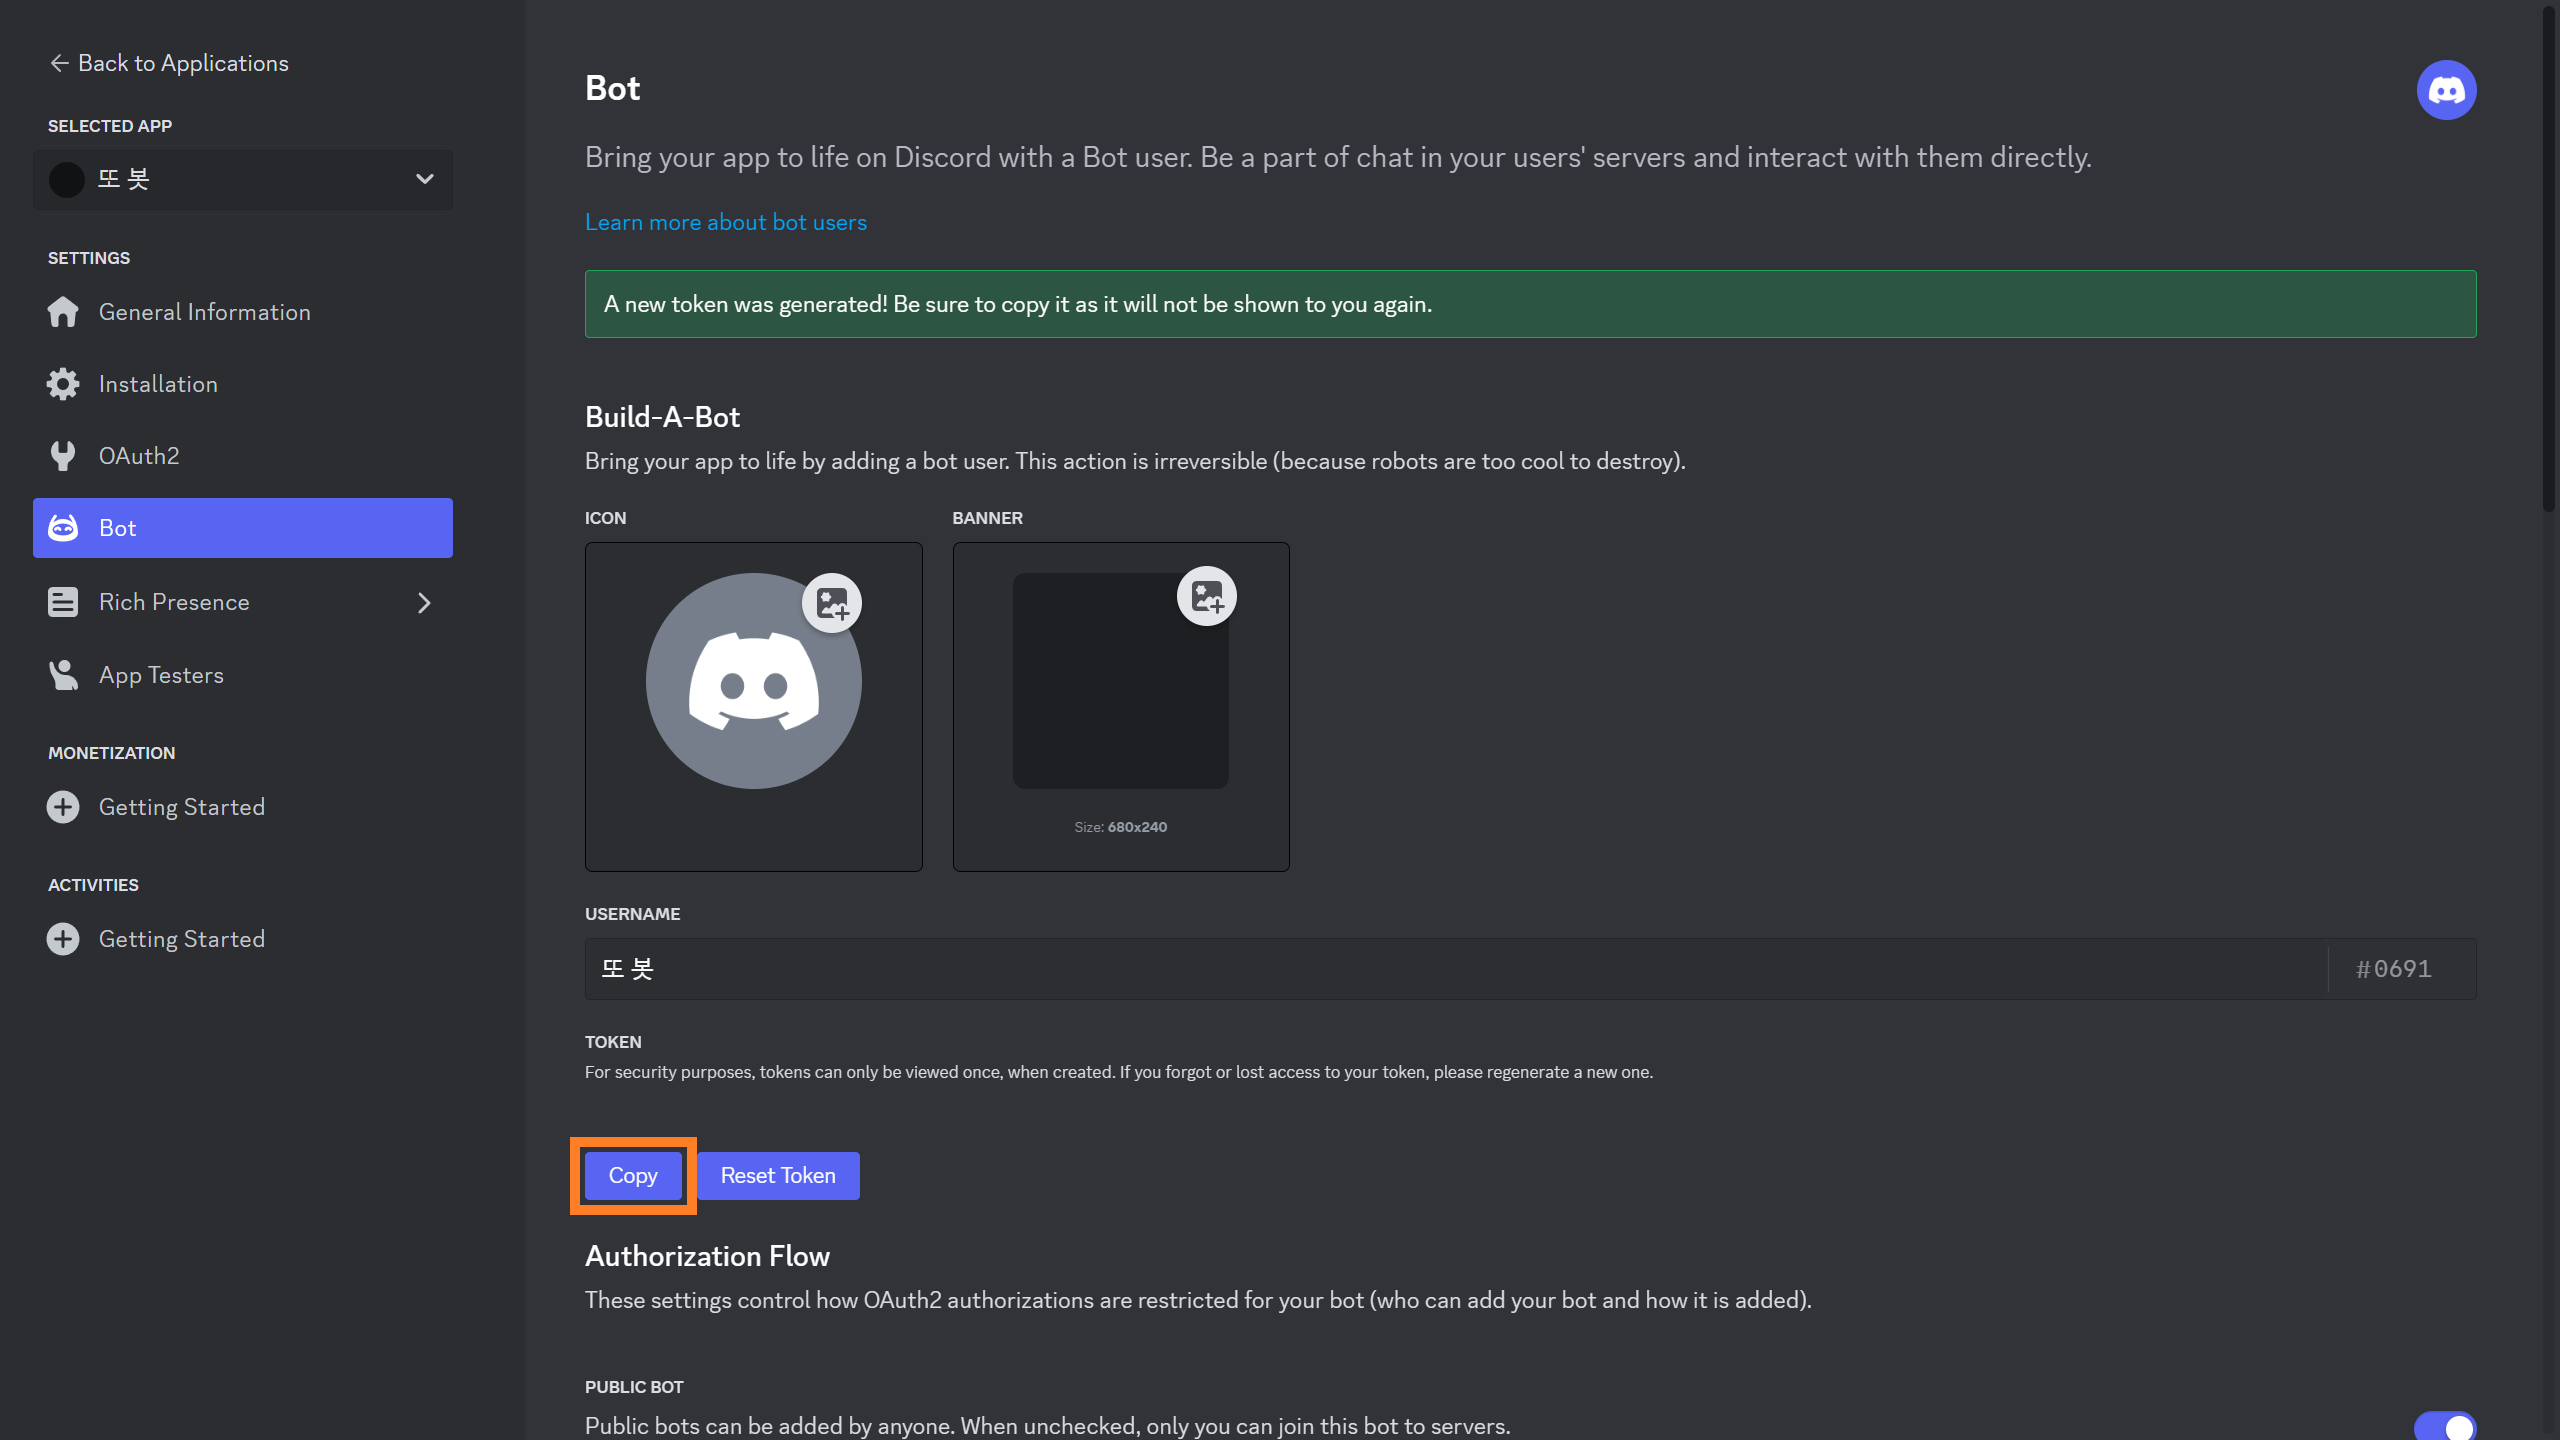
The newly issued token is shown at creation time. Copy it and store it securely before closing or refreshing the page. If it is lost, reset it again.
Treat the token like the bot’s password. Never share it or publish it in a repository. If it is exposed, reset it immediately.
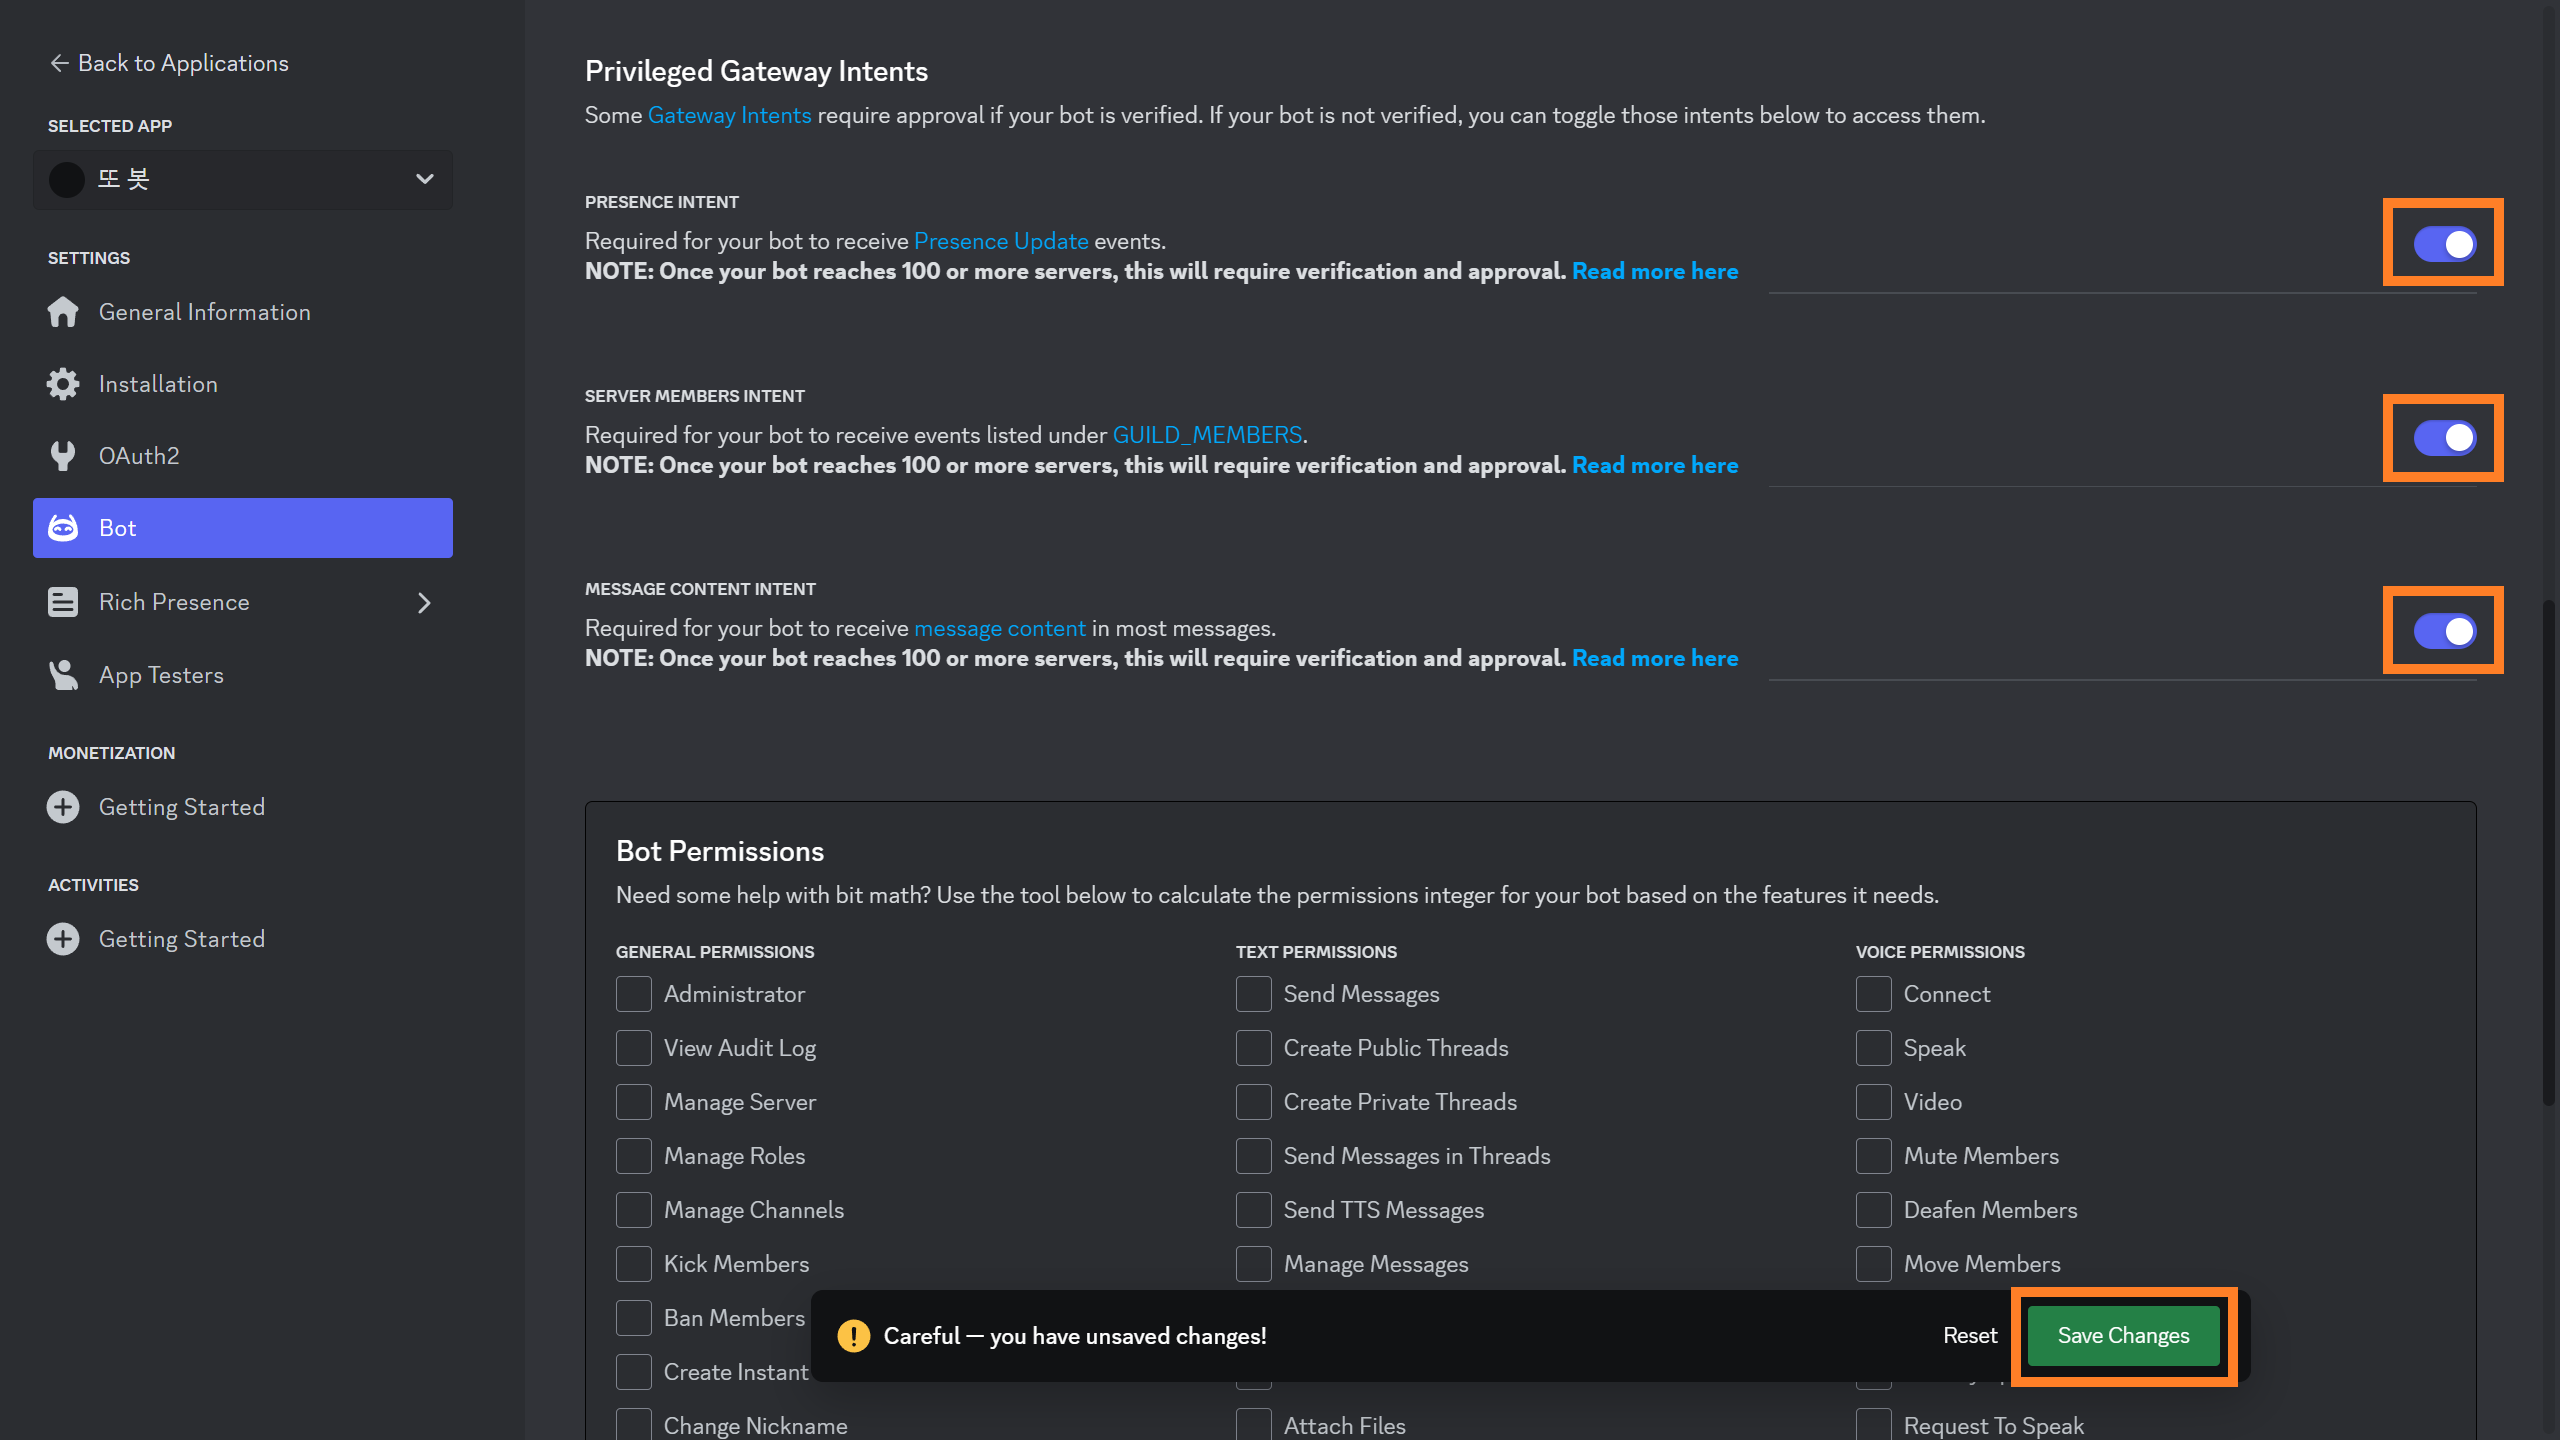
Intents control which event data the bot requests. Privileged intents such as GUILD_PRESENCES, GUILD_MEMBERS, and MESSAGE_CONTENT require additional configuration. For this example, enable Message Content Intent and save the change. A later member-join example also needs Server Members Intent. See the official intents guide.
Larger bots may also require Discord’s approval for privileged intents; check the current verification requirements when expanding beyond a test guild.
1
2
3
4
5
6
7
# This example requires the 'message_content' intent.

import discord

intents = discord.Intents.default()
intents.message_content = True
...
Keep discord.Intents.default() and enable message_content in code. Both the code and portal settings must match the features being used. For an initial local test, replace 'your token here' with the token, then move it to an environment variable as described below before sharing any code.

If the connection succeeds, on_ready() prints its log message. Incorrect privileged-intent settings can cause this error:
1
discord.errors.PrivilegedIntentsRequired: Shard ID None is requesting privileged intents that have not been explicitly enabled in the developer portal. It is recommended to go to https://discord.com/developers/applications/ and explicitly enable the privileged intents within your application's page. If this is not possible, then consider disabling the privileged intents instead.
If this appears, check the requested intents in both the code and the Developer Portal.
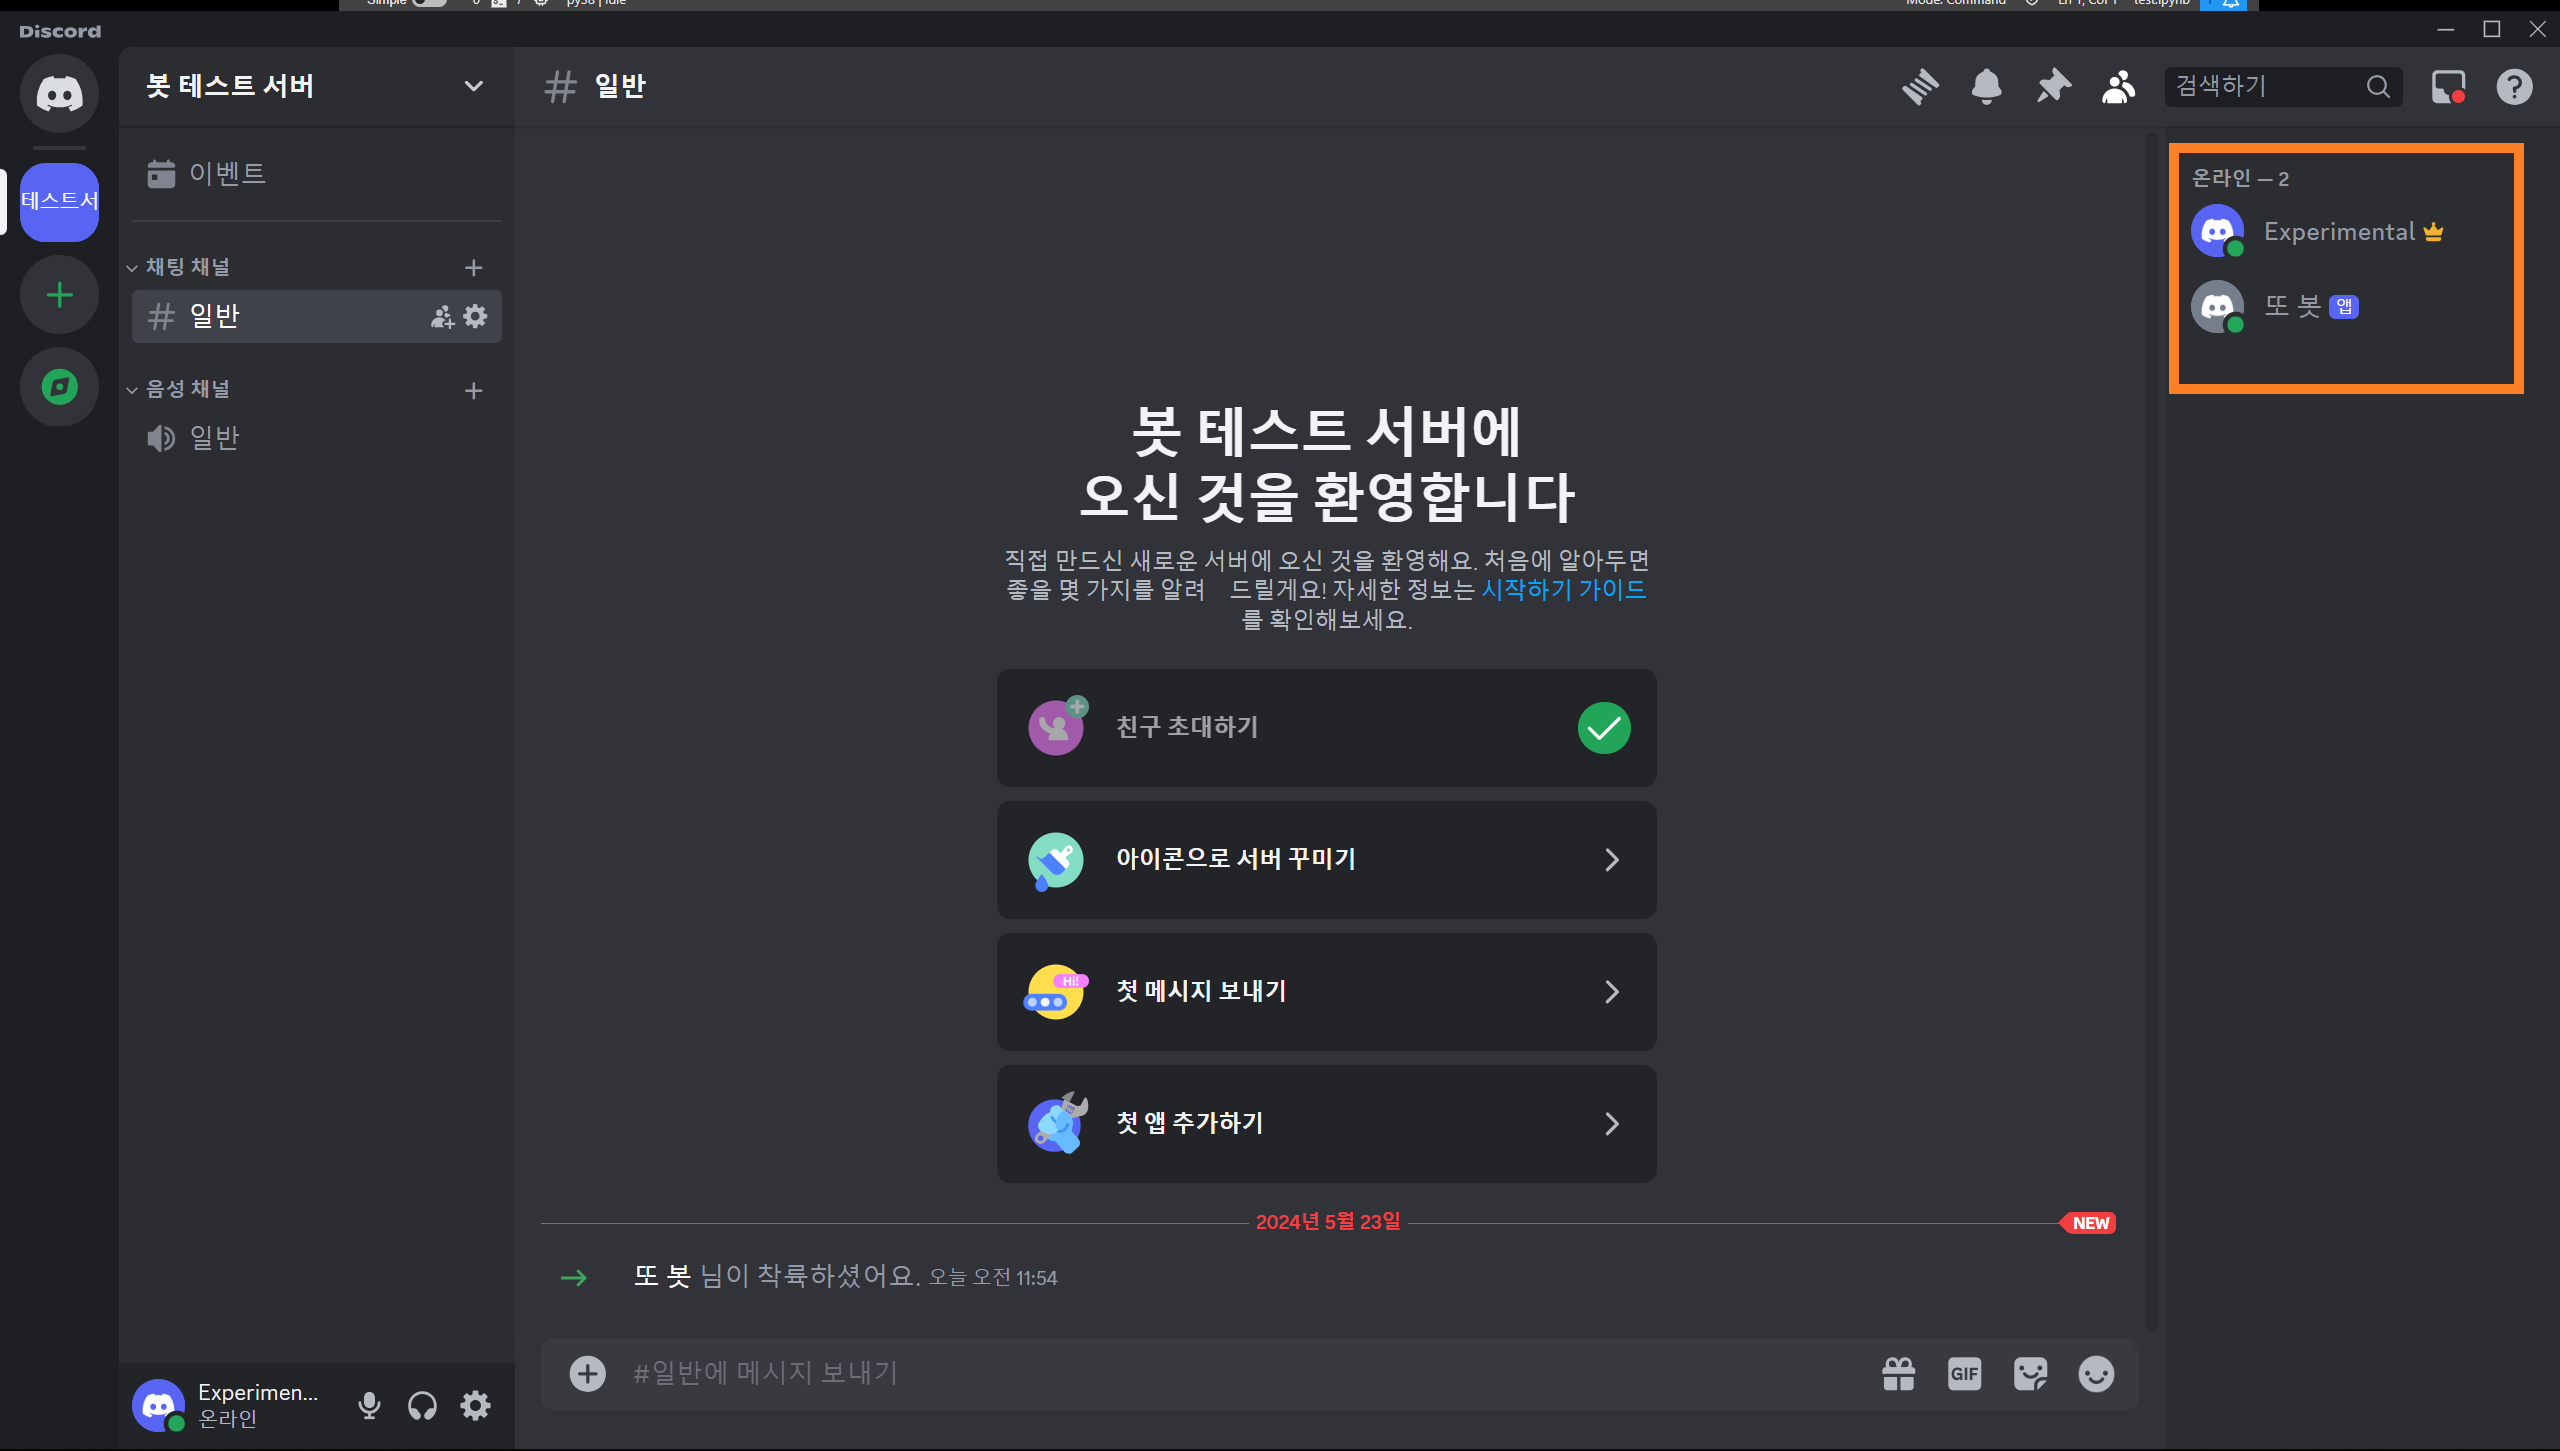
The bot should now appear online. Our empty shell has come to life.

Messages beginning with $hello cause the bot to send the response defined in the handler.
3. Use an environment variable
The eventual goal is deployment, so the token should not remain embedded in the source. We will store it in a .env file.
📦Discord Bot
 ┣ 📜.env
 ┗ 📜bot.py
1
2
# .env
BOT_TOKEN={봇 토큰}
Create .env alongside the Python entry point and set BOT_TOKEN to the token. Keep this file out of version control.
1
pip install -U python-dotenv
Install python-dotenv if necessary so Python can read the file.
1
2
3
4
5
6
7
8
9
10
# This example requires the 'message_content' intent.

import discord
import os
from dotenv import load_dotenv

load_dotenv()

TOKEN = os.getenv('BOT_TOKEN')
...
Import the required functions and call load_dotenv() to load the file’s values into the environment.
1
2
...
client.run(TOKEN)
Replace the literal token in run() with BOT_TOKEN.
The bot currently does little more than respond to a conditional check on a message, but even that makes an otherwise quiet test guild feel less empty. Next we will use discord.ext.commands to create actual commands.
Appendix
i. Complete code
Show code
1
2
3
4
5
6
7
8
9
10
11
12
13
14
15
16
17
18
19
20
21
22
23
24
# bot.py
import os, discord
from dotenv import load_dotenv

load_dotenv()
TOKEN = os.getenv('BOT_TOKEN')

intents = discord.Intents.all()

client = discord.Client(intents=intents)

@client.event
async def on_ready():
    print(f'{client.user}(으)로 접속했습니다.')

@client.event
async def on_message(message):
    if message.author == client.user:
        return

    if message.content.startswith('$hello'):
        await message.channel.send('Hello!')

client.run(TOKEN)
ii. Folder structure
📦Discord Bot
 ┣ 📜.env
 ┗ 📜bot.py
댓글