In this entry
- Moving from
ClienttoBot- Creating commands
- Basic error handling
Bot and the commands extension
Bot is a subclass of Client. We could build everything with Client, but manually interpreting messages in event handlers becomes tedious. The discord.ext.commands extension supplies Bot and tools that make adding commands easier.
1. Add a command with Bot
1
2
3
4
5
6
7
from discord.ext import commands

import discord

intents = discord.Intents.default()
intents.message_content = True
bot = commands.Bot(command_prefix='!', intents=intents) # 명령어 인식 기호
Import commands separately from discord. When creating a bot, specify command_prefix and the required intents. Here, messages start with !, followed by a registered command name.
You can pass several prefixes, such as
('!', '?'). An empty prefix allows a registered command name to be used without a prefix.
A Command represents a function invoked through a command. Adding the @bot.command decorator registers an asynchronous function. When the name following the prefix matches the decorator’s name, that command runs. Here is the previous message handler, followed by its command-based equivalent.
1
2
3
4
5
6
7
8
9
10
11
12
13
14
15
16
17
18
19
20
21
22
23
24
25
# bot.py
# 수정 전
import os, discord
from dotenv import load_dotenv

load_dotenv()
TOKEN = os.getenv('BOT_TOKEN')

intents = discord.Intents.all()

client = discord.Client(intents=intents)

@client.event
async def on_ready():
    print(f'{client.user}(으)로 접속했습니다.')

@client.event
async def on_message(message):
    if message.author == client.user:
        return

    if message.content.startswith('$hello'):
        await message.channel.send('Hello!')

client.run(TOKEN)
1
2
3
4
5
6
7
8
9
10
11
12
13
14
15
16
17
18
19
20
21
22
# bot.py
# 수정 후
import os, discord
from discord.ext import commands
from dotenv import load_dotenv

load_dotenv()
TOKEN = os.getenv('BOT_TOKEN')

intents = discord.Intents.all()

bot = commands.Bot(command_prefix='$', intents=intents)

@bot.event
async def on_ready():
    print(f'{bot.user}(으)로 접속했습니다.')

@bot.command(name='hello')
async def hello(ctx):
    await ctx.send('Hello!')

bot.run(TOKEN)
Both examples respond in the same way. The second uses a command instead of defining an on_message() handler. With name='hello', the prefix and name combine into $hello.
ctxcontains the invocation context, including who invoked the command and which channel it came from.
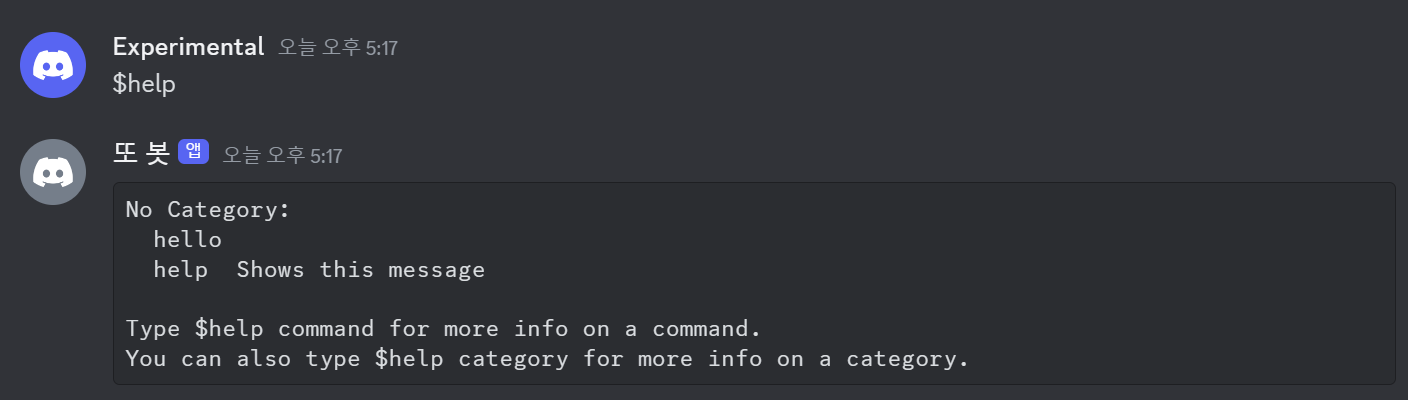
The commands extension also tracks registered commands and supplies a help command that lists them automatically.
1
@bot.command(name='hello', help="인사를 합니다")
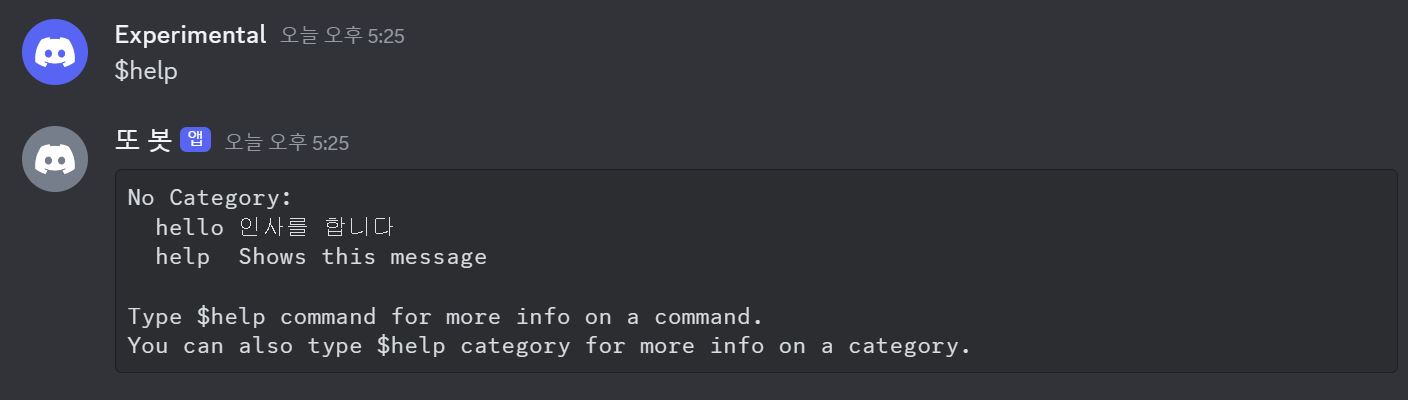
Add a help argument to a command decorator to describe the command. This is a simple way to show users what the bot can do, and one of several conveniences Bot adds to Client.
2. Add parameters
When parsing messages manually, we receive strings and must convert them ourselves. Commands can use parameter annotations to request a conversion.
1
2
3
4
@bot.command(name='곱하기', help="숫자 두 개를 곱합니다")
async def multiply(ctx, first_int: int, second_int: int):
    product = first_int * second_int
    await ctx.send("결과는 ", product, "입니다.")
The : int annotations on first_int and second_int request integer values. Users can still supply invalid input, so error handling remains necessary. Supported converters also include Discord-specific types such as guilds and members.
1
2
3
4
@bot.command(name='참가일', help="멤버의 서버 참가 날짜를 알려줍니다")
async def joined(ctx, member: discord.Member):
    join_date = member.joined_at.strftime("%Y-%m-%d")
    await ctx.send(f"{member.display_name}님은 {join_date}에 서버에 참가했습니다.")
This command displays when a member joined the current guild. Annotating the parameter as discord.Member asks the framework to resolve a member object, whose joined_at attribute provides the join time.
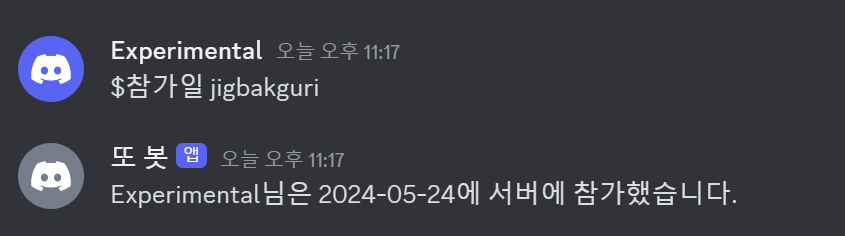
Other useful member attributes include display_name, the name shown in the guild; name, the username; and id, the stable user identifier. Choose the attribute that matches the task.
3. Handle command errors
1
2
3
4
@multiply.error
async def multiply_error(ctx, error):
    if isinstance(error, commands.BadArgument):
        await ctx.send("오류: 정수 두 개를 입력해 주세요.")
Another advantage of the extension is a dedicated error handler for a command. This example handles BadArgument, which can occur when an argument cannot be converted to the requested type.
The exception reference lists other command errors.
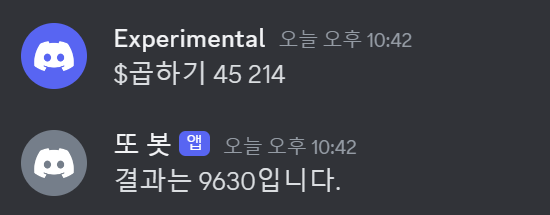
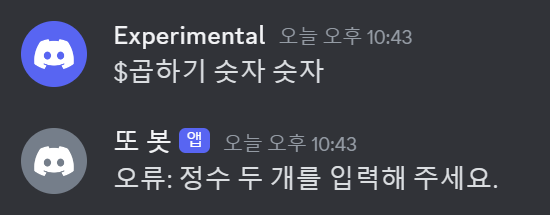
The bot now gives different responses for valid integer input and invalid input. Another approach is to constrain input through the interface, such as by providing choices. We will explore that with another command system later.
Appendix
i. Complete code
Show code
1
2
3
4
5
6
7
8
9
10
11
12
13
14
15
16
17
18
19
20
21
22
23
24
25
26
27
28
29
30
31
32
33
34
35
# bot.py
import os, discord
from discord.ext import commands
from dotenv import load_dotenv

load_dotenv()
TOKEN = os.getenv('BOT_TOKEN')

intents = discord.Intents.all()

bot = commands.Bot(command_prefix='$', intents=intents)

@bot.event
async def on_ready():
    print(f'{bot.user}(으)로 접속했습니다.')

@bot.command(name='hello', help="인사를 합니다")
async def hello(ctx):
    await ctx.send("Hello!")

@bot.command(name='곱하기', help="숫자 두 개를 곱합니다")
async def multiply(ctx, first_int: int, second_int: int):
    await ctx.send(f"결과는 {product}입니다.")

@bot.command(name='참가일', help="멤버의 서버 참가 날짜를 알려줍니다")
async def joined(ctx, member: discord.Member):
    join_date = member.joined_at.strftime("%Y-%m-%d")
    await ctx.send(f"{member.display_name}님은 {join_date}에 서버에 참가했습니다.")

@multiply.error
async def multiply_error(ctx, error):
    if isinstance(error, commands.BadArgument):
        await ctx.send("오류: 정수 두 개를 입력해 주세요.")

bot.run(TOKEN)
ii. Folder structure
📦Discord Bot
 ┣ 📜.env
 ┗ 📜bot.py
댓글